This guide provides a detailed walkthrough for creating, configuring, and assigning Contact Form 7 forms in the Wiso and Liko WordPress themes. It also includes troubleshooting tips for common errors.
1. Creating a New Contact Form
Step-by-step:
- From your WordPress Dashboard, go to Contact > Add New.
- Give your form a title, such as “Contact Form Black”.
2. Configuring the Contact Form Tabs
A. Form Tab
Use the following default template:
[submit "Submit"]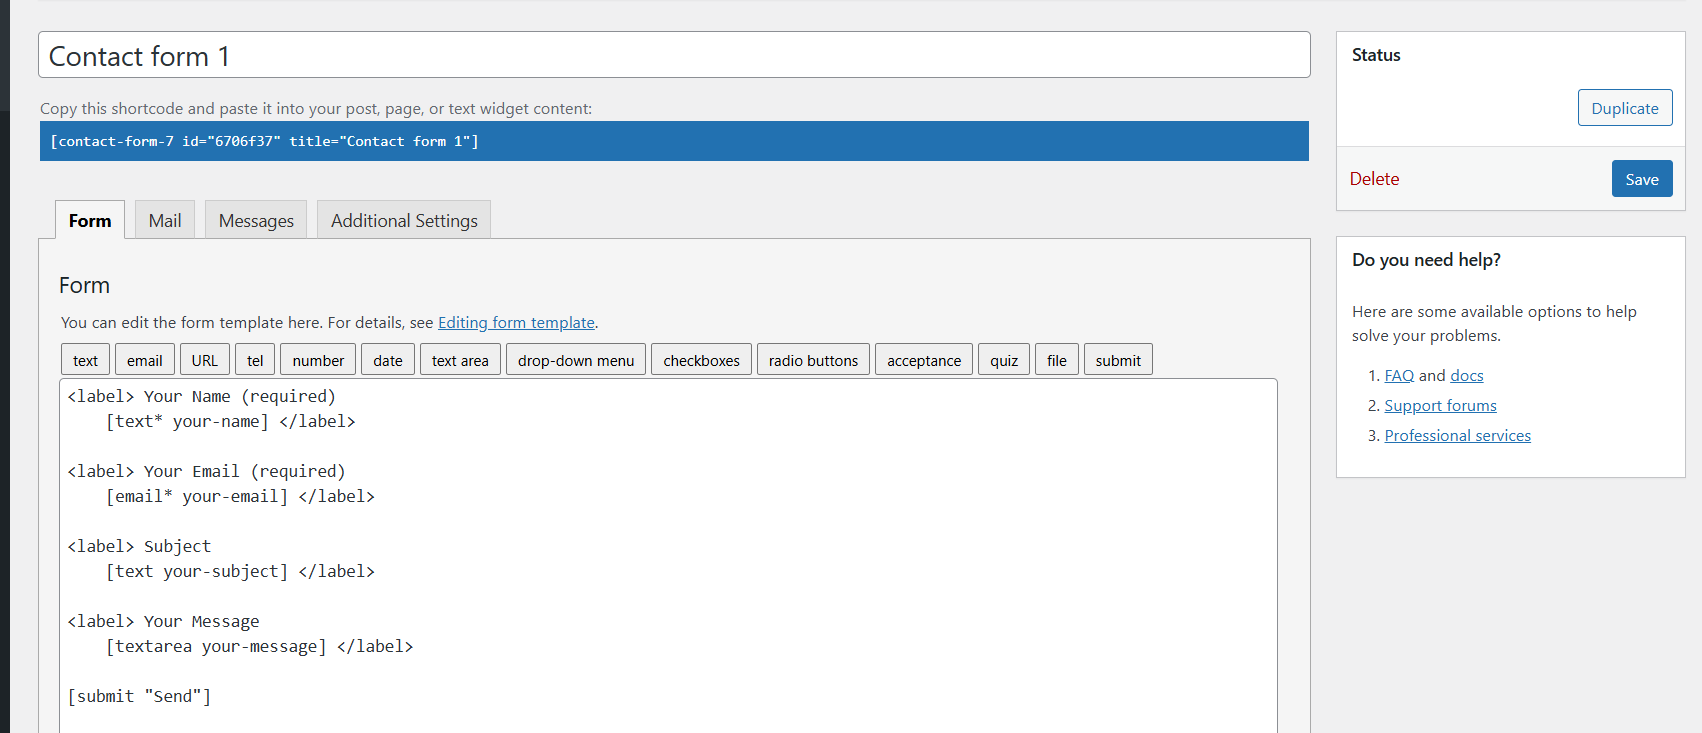
Explanation:
- The
labeltag wraps each input field, which ensures accessibility and clarity. text*,email*indicate required fields—the asterisk*makes them mandatory.autocomplete:nameandautocomplete:emailenable browser autofill for user convenience.- This configuration prevents submission unless all required fields are filled correctly.
Working Alternatives: If you don’t need all fields to be required:
Or if you prefer placeholders instead of labels:
[text* your-name placeholder "Your Name"]
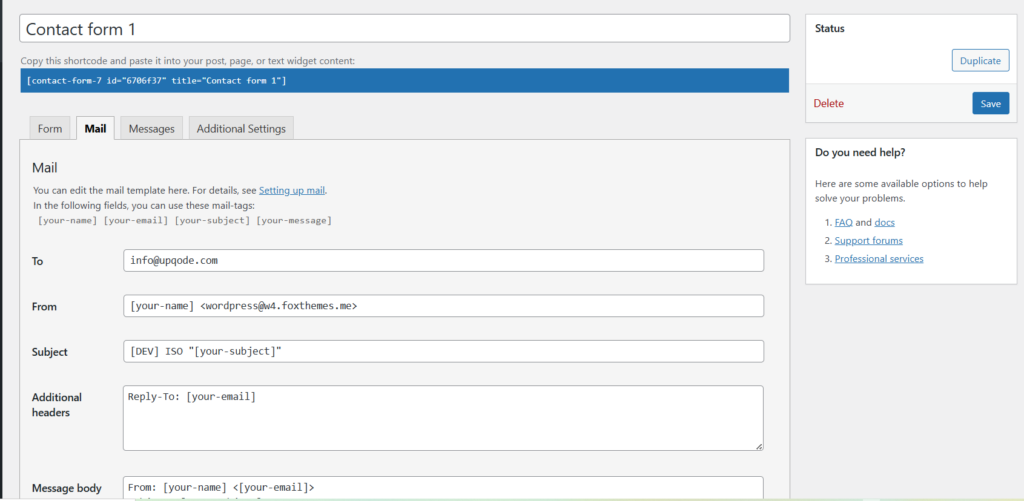
[email* your-email placeholder "Your Email"]B. Mail Tab
Ensure the fields match exactly with those in your form:
- To:
[_site_admin_email] - From:
[_site_title] - Subject:
[_site_title] "[your-subject]" - Additional Headers:
Reply-To: [your-email] - Message Body:
From: [your-name] [your-email]
Subject: [your-subject]

Message Body:
[your-message]

--
This is a notification that a contact form was submitted on your website ([_site_title] [_site_url]).- Check: Use HTML content type
C. Messages Tab
Customize the success/error messages if needed. Default messages often suffice but feel free to localize or enhance for clarity.
D. Additional Settings Tab
Usually this is left blank unless custom behavior is needed.
Save the Form
Click Save to finalize your form setup.
3. Get the Form ID
After saving, you’ll receive a shortcode like this:
[contact-form-7 id="7b2846f" title="Contact form black"]Here, the ID is 7b2846f.

4. Assigning Contact Forms in Wiso Theme
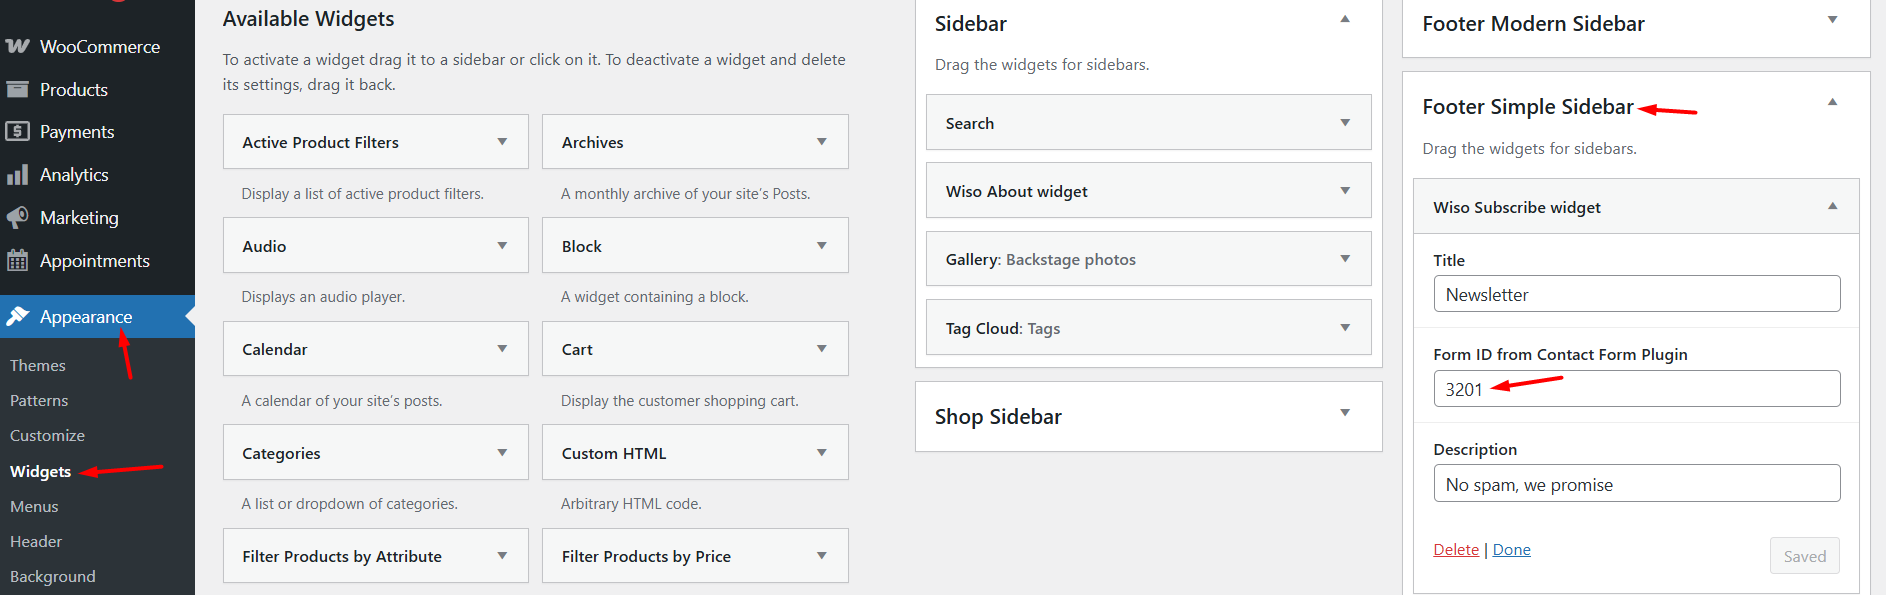
A. Newsletter in Footer
- Go to Appearance > Widgets.
- Locate the Footer Simple Sidebar.
- Add a Wiso Subscribe widget.
- In the field labeled “Form ID from Contact Form Plugin”, enter your form ID (e.g.
7b2846f). - Click Save.
- Visit your site’s front-end and test the form. For newsletter forms, only an email field is required.
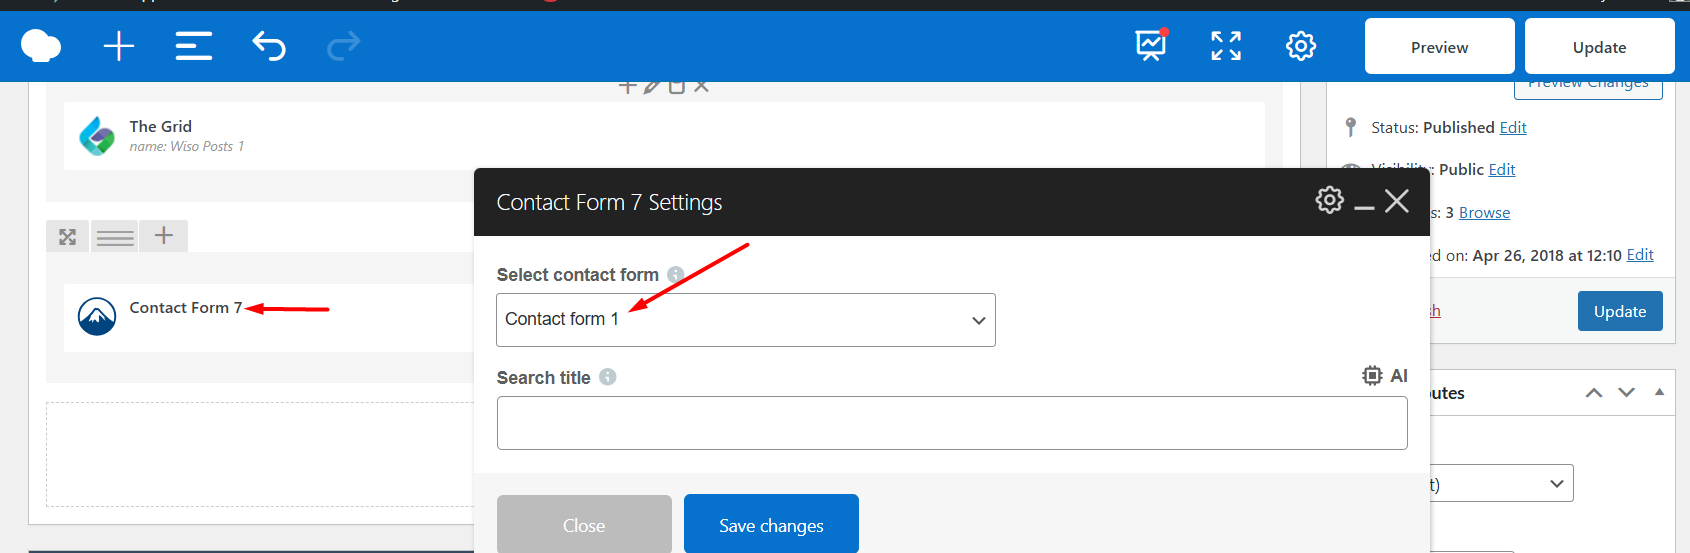
B. Inserting Form on a Page (WPBakery Editor)
- Edit your page with WPBakery.
- Insert the Contact Form 7 element.
- Select the form by its title.
C. Inserting via Shortcode
In any WordPress editor block, paste the shortcode:
[contact-form-7 id="7b2846f" title="Contact form black"]5. Assigning Contact Forms in Liko Theme
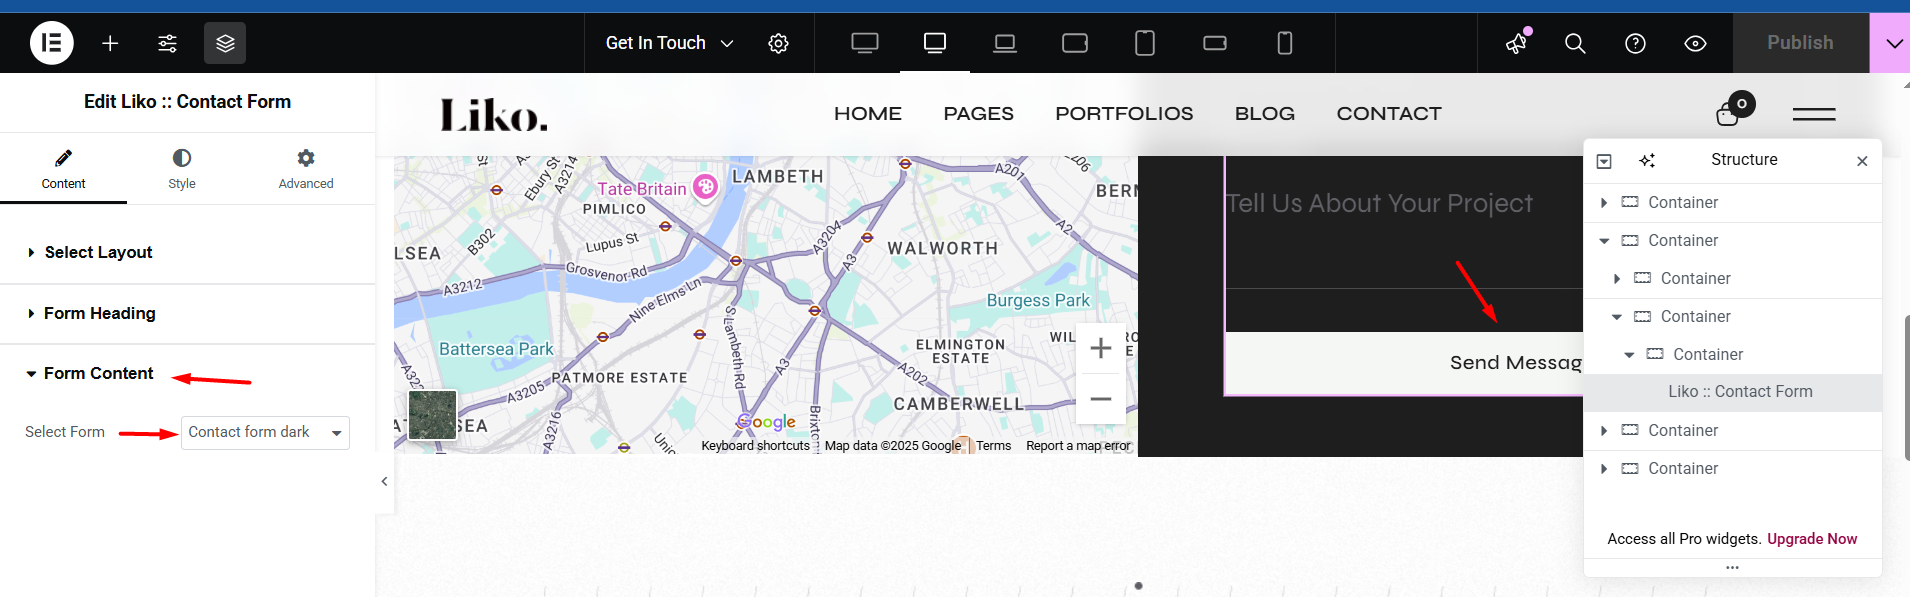
A. Contact Page Setup (with Elementor)
- Navigate to Pages > Contact.
- Click Edit with Elementor.
- Drag and drop the Liko: Contact Form widget.
- In the Form Content panel, choose the form title to assign it.
B. Assign via Elementor Shortcode Widget
- Use the Shortcode widget.
- Paste the form shortcode there.
6. Troubleshooting Common Issues
A. “Email address entered is invalid”
- Ensure
[email* your-email]is used in both the form and mail tabs. - Avoid placeholder typos or unrecognized field names.
B. “One or more fields have an error. Please check and try again.”
- Ensure all required fields are filled.
- Use correct syntax: all required fields must have an asterisk (e.g.
[text* your-name]).
C. Form Not Submitting
- Check if Contact Form 7 is fully installed and activated.
- Ensure no JavaScript errors are occurring (check via browser dev tools).
- Confirm mail settings are correctly mapped and valid.
D. No Emails Received
- Check spam/junk folder.
- Try using a custom email address for
From:in the mail tab. - Install an SMTP plugin like WP Mail SMTP to ensure reliable email delivery.
For further assistance, refer to the official Contact Form 7 documentation or reach out via the theme’s support platform.