Introduction #
The Max Mega Menu plugin allows you to transform your Portomega theme’s navigation into a visually rich, interactive mega menu. This guide will walk you through the process of setting up and enabling the Mega Menu in your Portomega theme using the Max Mega Menu plugin.
Steps to Enable Max Mega Menu #
Step 1: Install and Activate the Max Mega Menu Plugin #
- Go to Dashboard > Plugins > Add New.
- In the search bar, type Max Mega Menu and click Install.
- After installation, click Activate to enable the plugin.
[This can also be done under the required install plugins section] #
Step 2: Verify Plugin Settings in Your WordPress Dashboard #
After activating the plugin, you’ll notice a few new options:
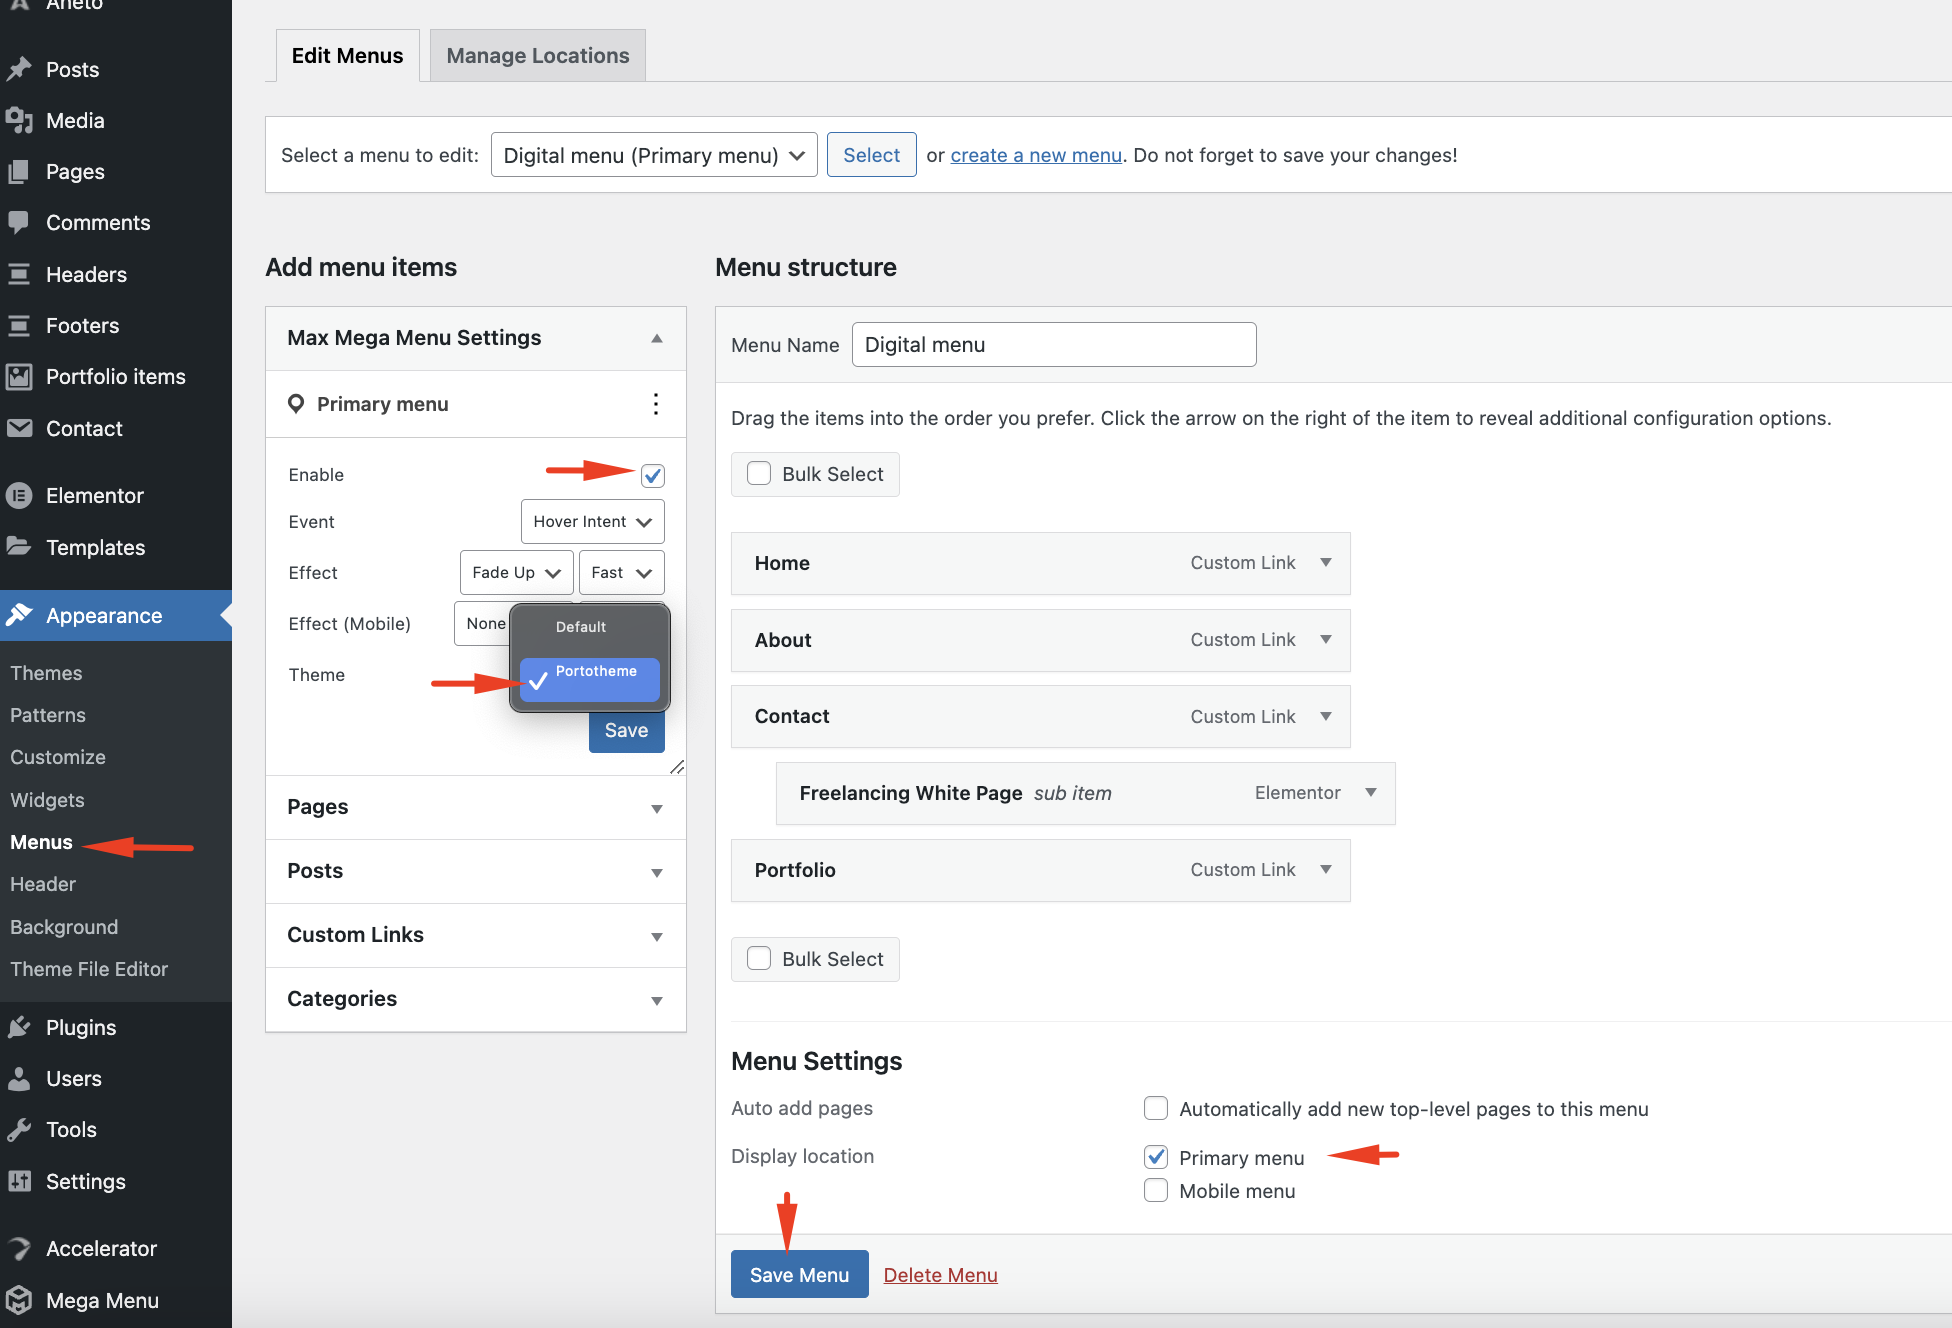
- Appearance > Menus: The menu management area now includes Max Mega Menu Settings on the left. A blue Mega Menu link also appears when hovering over each menu item.
- Dashboard > Mega Menu: A new menu in your Dashboard where you can create custom menu themes and configure plugin options.
Step 3: Enable Max Mega Menu for the Portomega Theme #
- Go to Appearance > Menus.
- If you don’t already have a menu set up:
- Click on create a new menu.
- Give your new menu a name and assign it to a Theme Location (like the Primary Menu) at the bottom of the page.
- In the Max Mega Menu Settings box on the left, check the Enable checkbox.
- In the Theme dropdown, select Portomega to apply the Portomega styling.
- Make sure the menu location is set to Primary Menu so it displays correctly on your site.
- Click Save to apply these settings.
Step 4: Configure Mega Menus for Individual Menu Items #
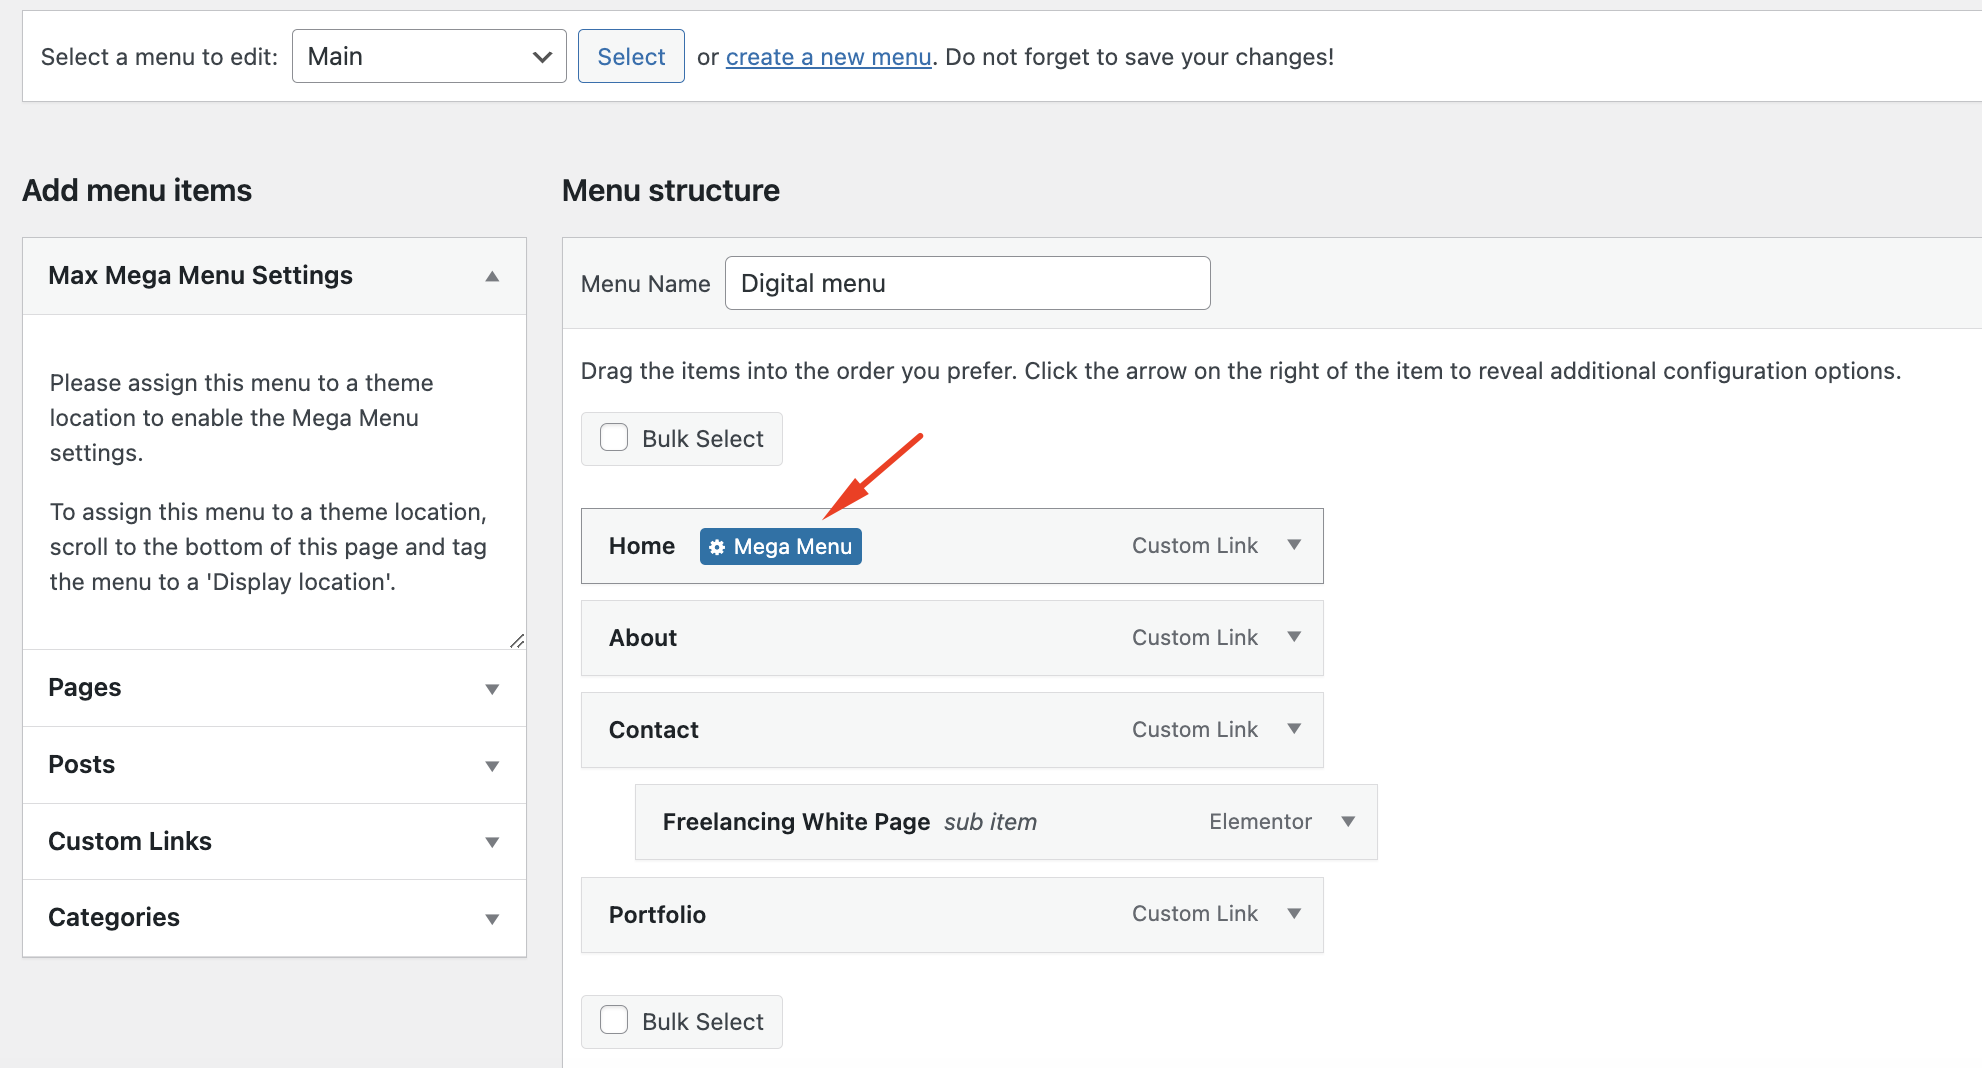
- In Appearance > Menus, hover over any menu item you want to configure. A blue Mega Menu button will appear.
- Click on the Mega Menu button to open the Mega Menu settings for that menu item.
Step 5: Convert Flyout Menus to Mega Menus #
By default, submenus are displayed in a Flyout (dropdown) format. To switch to a Mega Menu:
- In the Mega Menu settings, find the Sub Menu Display Mode option.
- Change the setting from Flyout Menu to Mega Menu – Grid Layout.
- The Grid Layout Editor will display submenu items (if any), allowing you to drag and drop them to arrange them into columns and rows for a structured Mega Menu. See more in this guide.
Step 6: Add Widgets to the Mega Menu #
- To add widgets, use the Widget Selector in the top-right of the Mega Menu editor.
- Choose any widget you want to add to your Mega Menu (such as latest products, sliders, images, custom HTML, or social icons).
- Drag and drop the widget into the Mega Menu layout, and arrange it as desired. See more in this guide.
Step 7: Save and Review #
Once you have configured all menu items and added any desired widgets:
- Click Save Menu.
- Visit your site to view your Mega Menu in action and ensure it’s working as expected.
Conclusion #
By following these steps, you can easily set up and enable a Mega Menu for the Portomega theme using the Max Mega Menu plugin. This allows you to create a visually appealing, organized menu layout that enhances user navigation and experience on your website. Experiment with different configurations to customize the Mega Menu to suit your site’s needs.


