Introduction #
PixFields is a powerful WordPress plugin that enables easy custom field management for your website. When used with the Prague theme, it allows users to enhance post types with additional custom fields for better content organization and filtering. This guide will walk you through the process of setting up and displaying PixFields on your site pages using the Prague theme.
Step 1: Ensure the Prague Theme is Active #
Before proceeding with PixFields, make sure that the Prague theme is active on your WordPress site. This ensures compatibility and proper styling of your custom fields.
Step 2: Install and Activate the PixFields Plugin #
- Navigate to Appearance > Install Plugins in your WordPress dashboard.
- You will notice that the PixField is listed as a recommended plugin.
- Click Install Now, then activate the plugin.
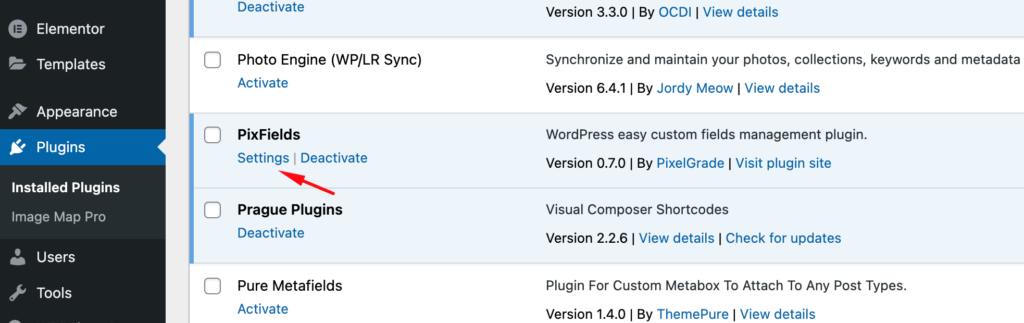
- Once activated, you will find the PixFields settings accessible via either:
- The Plugins page (Find PixFields and click on Settings)
- Settings > PixFields in the WordPress dashboard
Step 3: Configure PixFields Settings #
Within the PixFields settings page, you’ll find key configuration options:
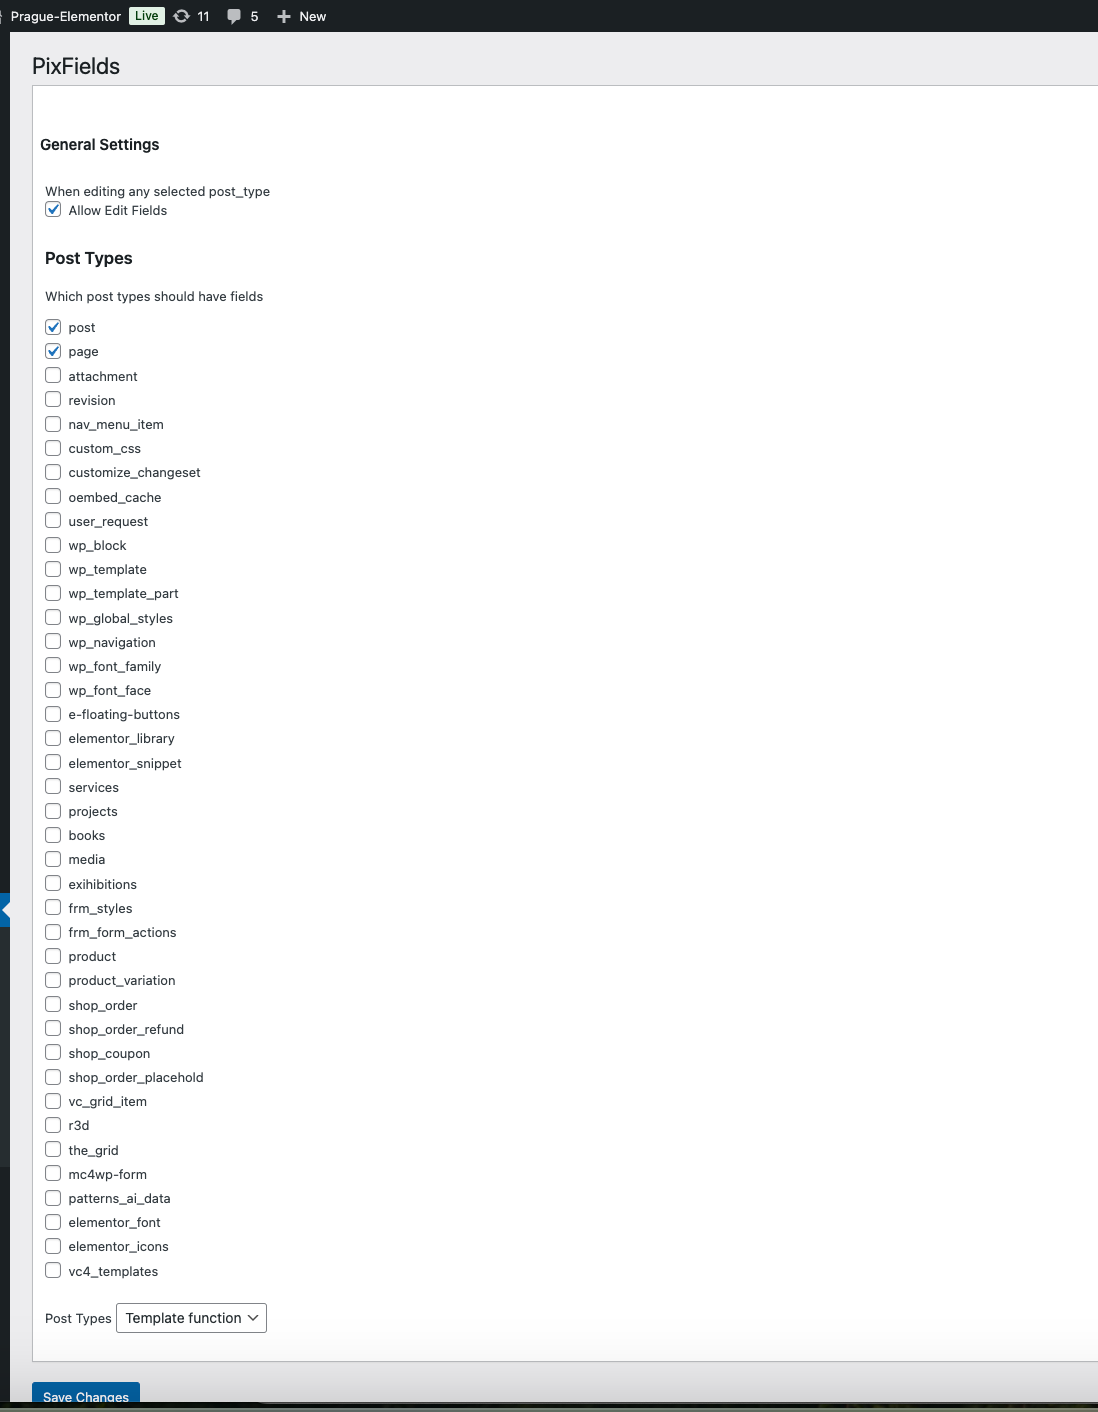
General Settings #
- Allow Edit Fields: This option lets you enable editing of PixFields for selected post types when editing any post or page.
Post Type Selection #
- Select the post types where you want PixFields to be available. By default, Posts and Pages are enabled.
- If you have custom post types (e.g., Projects, Portfolio, etc.), check their boxes to allow PixFields to be used within them.
Field Display Location #
- Choose where PixFields should be displayed within the selected post types:
- Template Function (Default Option)
- After Content
- Before Content
Step 4: Adding PixFields to Your Content #
Once you have configured PixFields settings:
- Navigate to a post type where you enabled PixFields (e.g., a Page or Project).
- Click Edit on a post or page where you want to add custom fields.
- In the right sidebar section, locate the PixFields section.
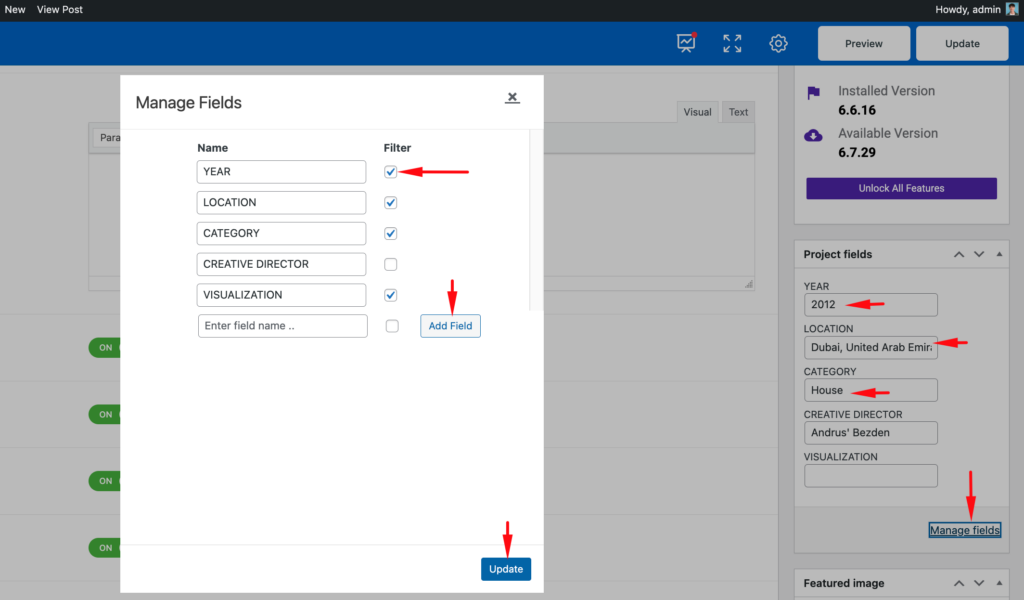
- Click on Manage Fields to open the field management popup.
- Add your desired fields (e.g., Location, Price, Custom Tags, etc.).
- If needed, enable filtering by checking the relevant checkbox. This allows filtering of content across multiple pages or post types (e.g., filtering posts by location).
- Click Update to save your changes. The added fields will now appear in the right sidebar of the post/page editor.
Step 5: Filling in PixFields Data #
After adding the custom fields:
- Locate each field in the right sidebar and enter the relevant data.
- Example: If you added a Location field, enter “New York” or your desired location.
- Ensure all fields are filled to make them visible on the frontend.
Step 6: Enabling PixFields for Specific Post Types #
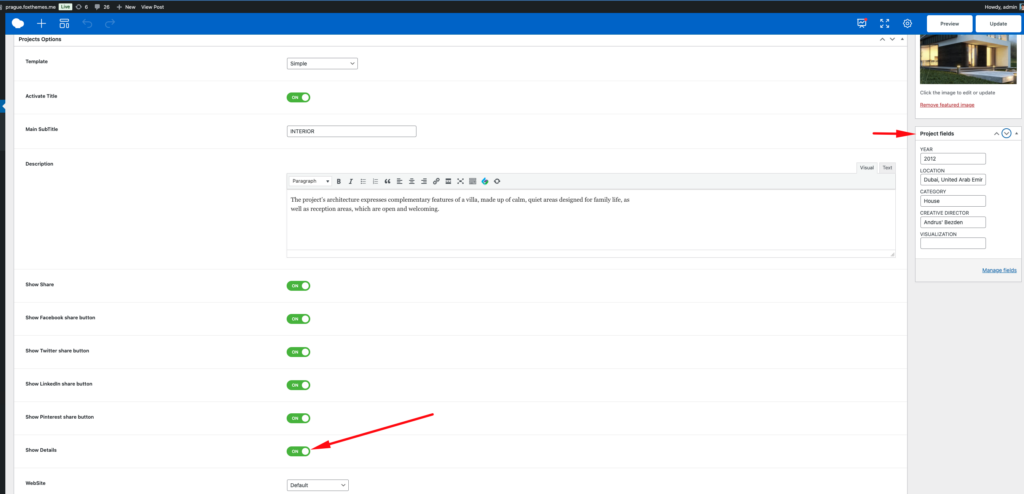
For certain post types (e.g., Projects), additional steps may be required:
- Within Project Options, ensure the Show Details option is enabled to display PixFields.
- In the Prague theme, when using Elementor, this option is enabled by default in the Custom Post Type element.
- Check the Timelist Template for Projects to see an example of how PixFields are displayed.
Conclusion #
By following these steps, you can successfully set up and display PixFields on your site pages using the Prague theme. PixFields allows for enhanced content organization and filtering, making it easier to manage your data effectively. If you have any issues, ensure that the correct post types and field settings are enabled. Happy customizing!


