This guide provides a detailed walkthrough for creating, configuring, and assigning Contact Form 7 forms in the Wiso and Liko WordPress themes. It also includes troubleshooting tips for common errors.
1. Creating a New Contact Form #
Step-by-step:
- From your WordPress Dashboard, go to Contact > Add New.
- Give your form a title, such as “Contact Form Black”.
2. Configuring the Contact Form Tabs #
A. Form Tab #
Use the following default template:
<label> Your name
    [text* your-name autocomplete:name] </label>

<label> Your email
    [email* your-email autocomplete:email] </label>

<label> Subject
    [text* your-subject] </label>

<label> Your message (optional)
    [textarea your-message] </label>

[submit "Submit"]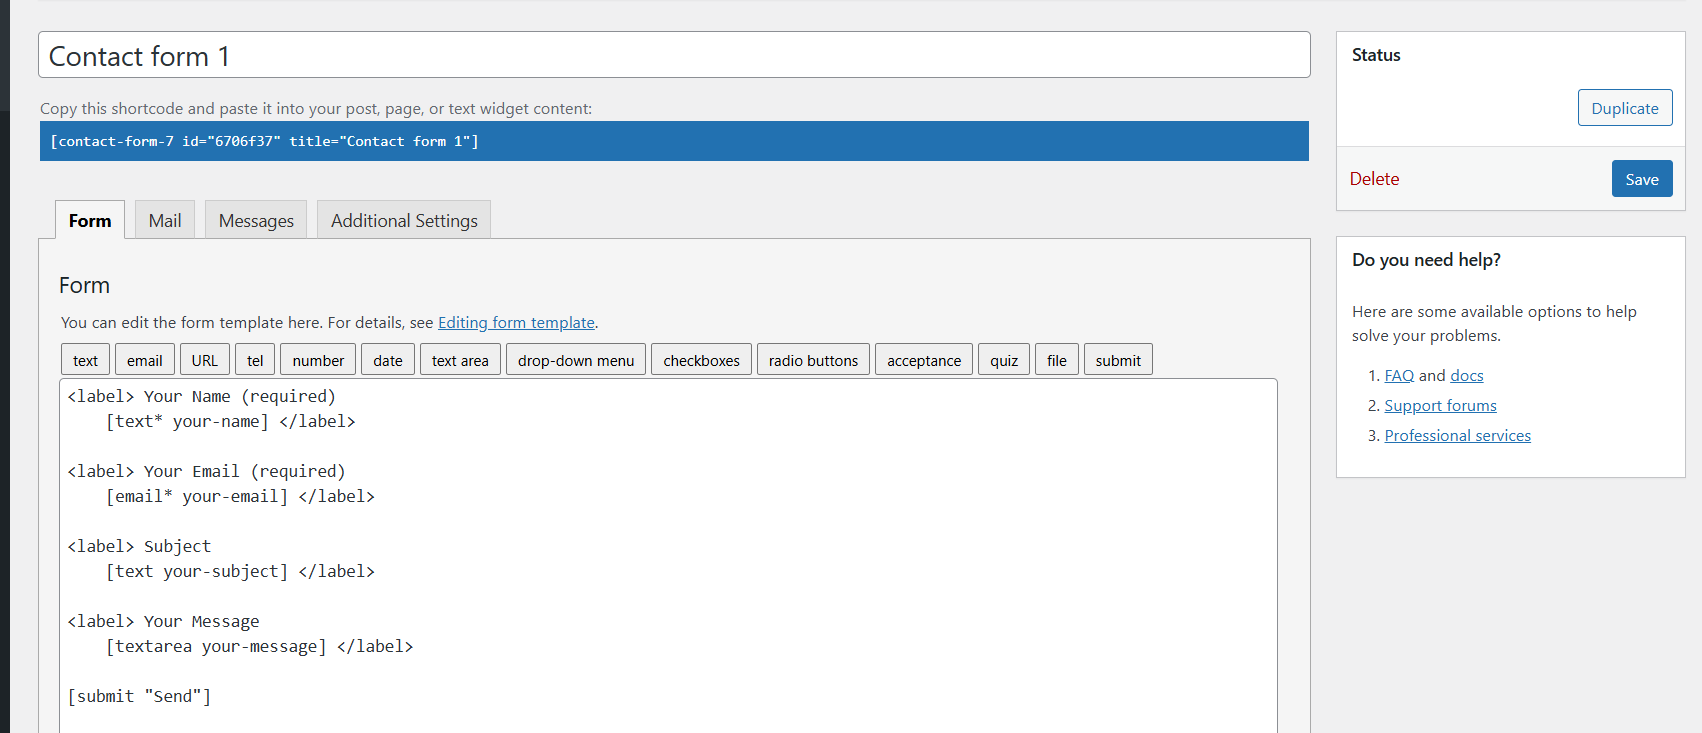
Explanation:
- The
labeltag wraps each input field, which ensures accessibility and clarity. text*,email*indicate required fields—the asterisk*makes them mandatory.autocomplete:nameandautocomplete:emailenable browser autofill for user convenience.- This configuration prevents submission unless all required fields are filled correctly.
Working Alternatives: If you don’t need all fields to be required:
<label> Your name
    [text your-name] </label>

<label> Your email
    [email your-email] </label>
Or if you prefer placeholders instead of labels:
[text* your-name placeholder "Your Name"]
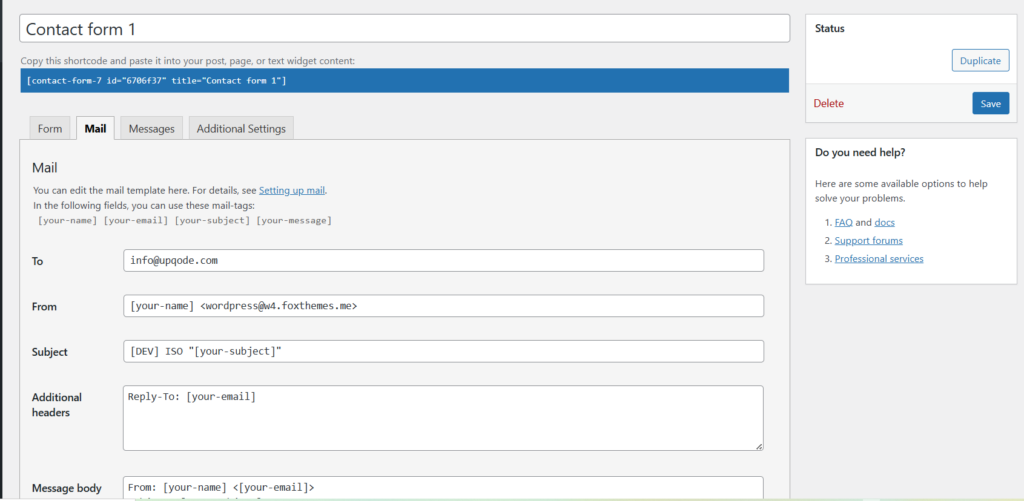
[email* your-email placeholder "Your Email"]B. Mail Tab #
Ensure the fields match exactly with those in your form:
- To:
[_site_admin_email] - From:
[_site_title] <wordpress@liko.foxthemes.me> - Subject:
[_site_title] "[your-subject]" - Additional Headers:
Reply-To: [your-email] - Message Body:
From: [your-name] [your-email]
Subject: [your-subject]

Message Body:
[your-message]

--
This is a notification that a contact form was submitted on your website ([_site_title] [_site_url]).- Check: Use HTML content type
C. Messages Tab #
Customize the success/error messages if needed. Default messages often suffice but feel free to localize or enhance for clarity.
D. Additional Settings Tab #
Usually this is left blank unless custom behavior is needed.
Save the Form #
Click Save to finalize your form setup.
3. Get the Form ID #
After saving, you’ll receive a shortcode like this:
[contact-form-7 id="7b2846f" title="Contact form black"]Here, the ID is 7b2846f.

4. Assigning Contact Forms in Wiso Theme #
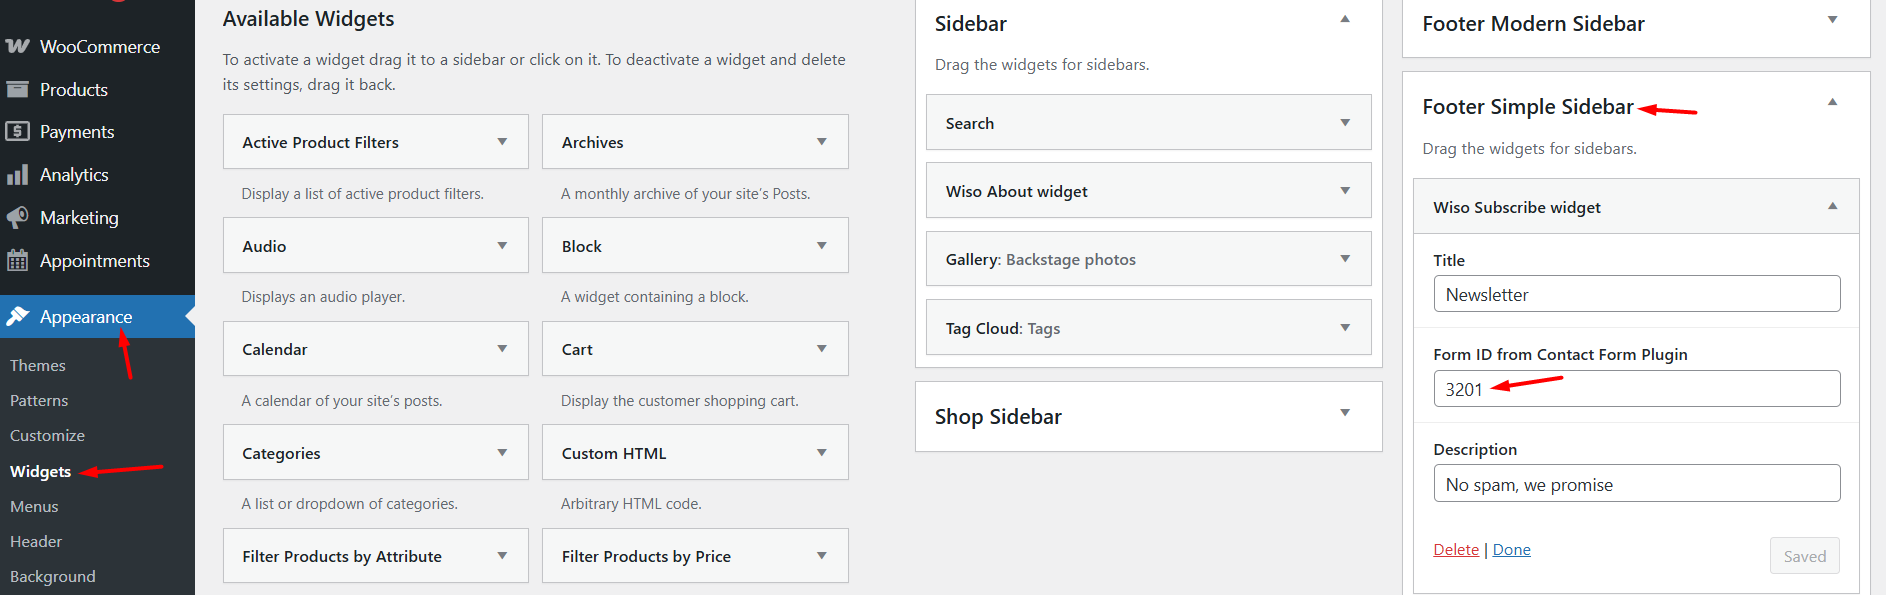
A. Newsletter in Footer #
- Go to Appearance > Widgets.
- Locate the Footer Simple Sidebar.
- Add a Wiso Subscribe widget.
- In the field labeled “Form ID from Contact Form Plugin”, enter your form ID (e.g.
7b2846f). - Click Save.
- Visit your site’s front-end and test the form. For newsletter forms, only an email field is required.
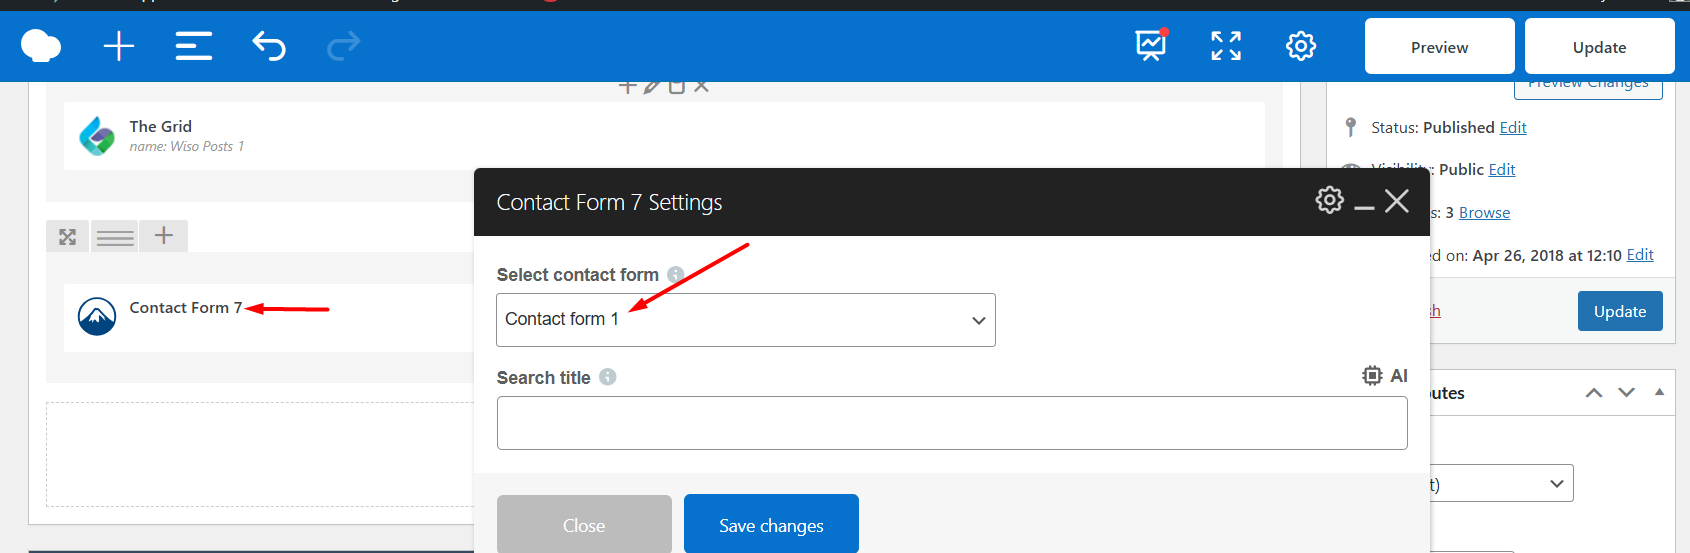
B. Inserting Form on a Page (WPBakery Editor) #
- Edit your page with WPBakery.
- Insert the Contact Form 7 element.
- Select the form by its title.
C. Inserting via Shortcode #
In any WordPress editor block, paste the shortcode:
[contact-form-7 id="7b2846f" title="Contact form black"]5. Assigning Contact Forms in Liko Theme #
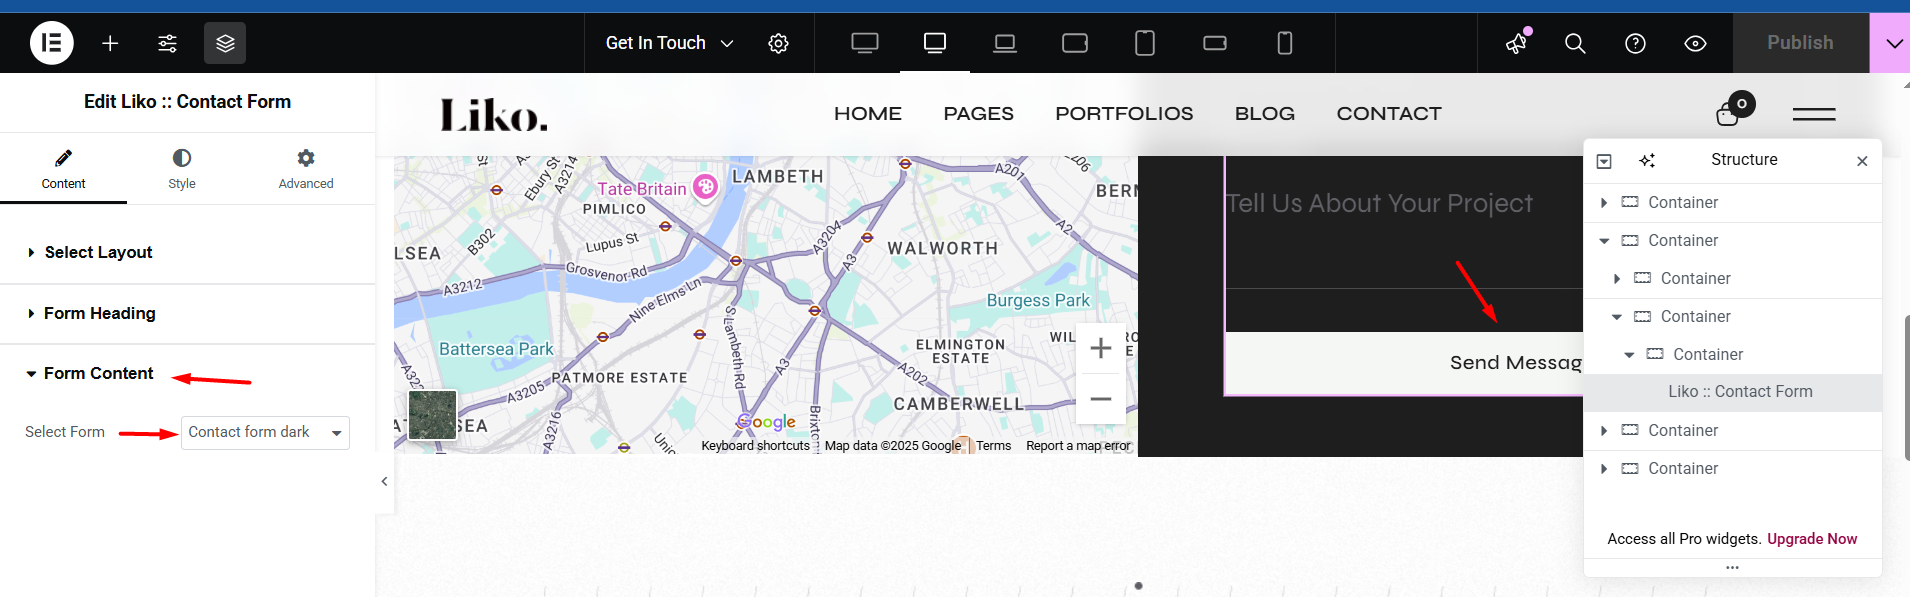
A. Contact Page Setup (with Elementor) #
- Navigate to Pages > Contact.
- Click Edit with Elementor.
- Drag and drop the Liko: Contact Form widget.
- In the Form Content panel, choose the form title to assign it.
B. Assign via Elementor Shortcode Widget #
- Use the Shortcode widget.
- Paste the form shortcode there.
6. Troubleshooting Common Issues #
A. “Email address entered is invalid” #
- Ensure
[email* your-email]is used in both the form and mail tabs. - Avoid placeholder typos or unrecognized field names.
B. “One or more fields have an error. Please check and try again.” #
- Ensure all required fields are filled.
- Use correct syntax: all required fields must have an asterisk (e.g.
[text* your-name]).
C. Form Not Submitting #
- Check if Contact Form 7 is fully installed and activated.
- Ensure no JavaScript errors are occurring (check via browser dev tools).
- Confirm mail settings are correctly mapped and valid.
D. No Emails Received #
- Check spam/junk folder.
- Try using a custom email address for
From:in the mail tab. - Install an SMTP plugin like WP Mail SMTP to ensure reliable email delivery.
For further assistance, refer to the official Contact Form 7 documentation or reach out via the theme’s support platform.


