Introduction #
Importing demo content for the Portomega theme allows you to set up your site with pre-designed layouts and templates quickly. This guide will walk you through the process of importing demo content, including adjusting settings for optimal performance and using the Aheto plugin’s demo import setup.
Requirements for Demo Import #
Before starting, ensure that:
- The Aheto plugin is installed and activated.
- All other required plugins are installed and activated, as outlined in the required plugins documentation.
Adjusting Server Settings for Demo Import #
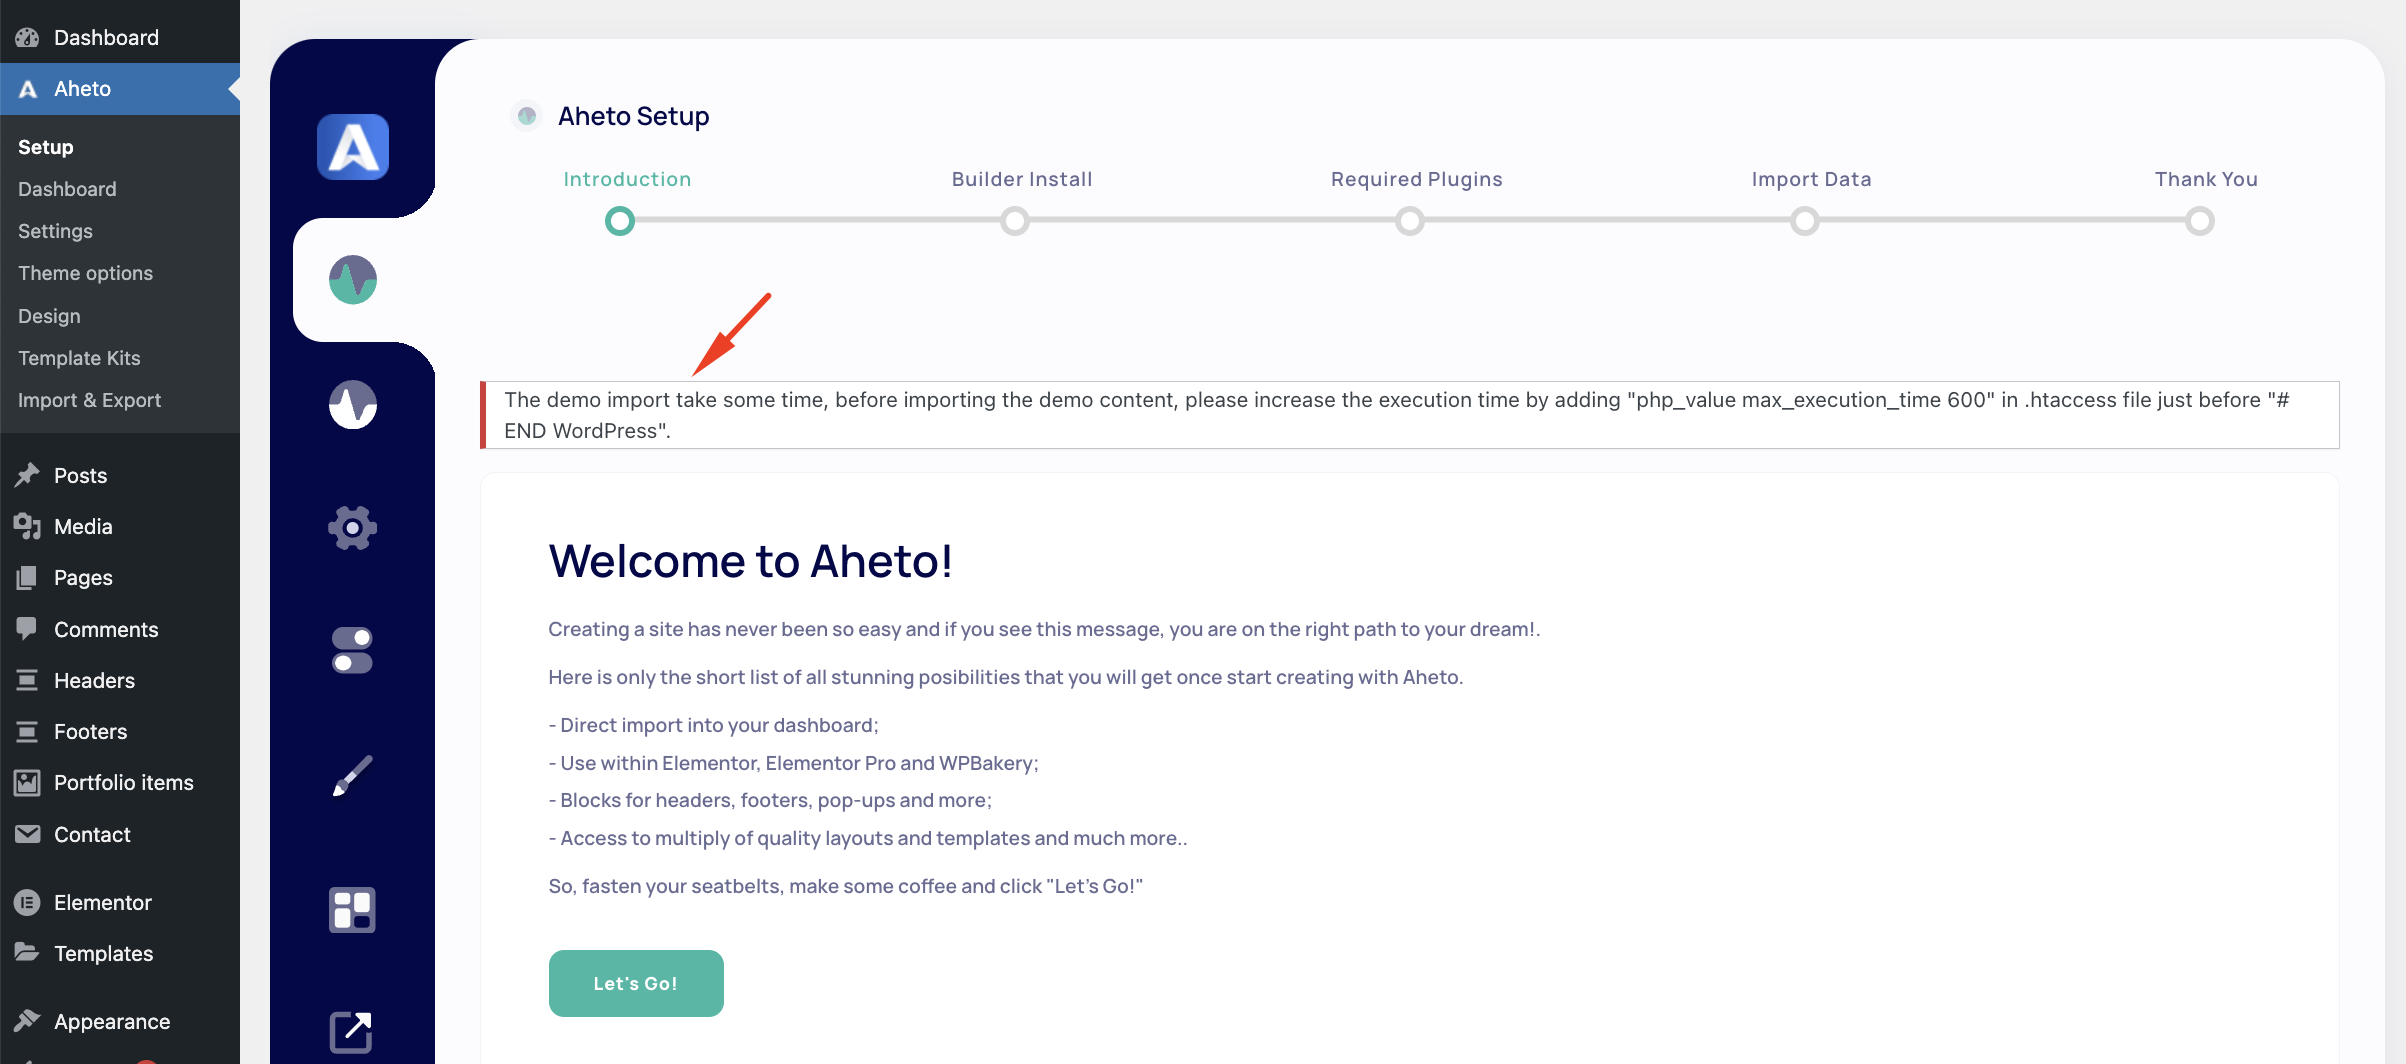
The demo import process can take some time, especially for larger demo files. To ensure a smooth import, you may need to increase your server’s execution time by adjusting the .htaccess file.
Steps to Increase Execution Time #
- Access the
.htaccessfile: This file is located in the root directory of your WordPress installation. - Edit the File:
- Add the following line just before
# END WordPress: - This increases the PHP execution time to 600 seconds, which helps prevent timeouts during the import.
- Add the following line just before
Note: If you’re unable to edit the
.htaccessfile, consult your hosting provider or contact our support team. You may need to provide FTP credentials for additional assistance.
Demo Import Process in Aheto Plugin #
With all plugins active and the server configuration set, you’re ready to import the demo content.
- Navigate to Aheto Demo Setup: Go to WP Admin > Aheto > Setup.
- The Aheto Setup Screen: The setup screen in Aheto has five steps, as outlined below.
Step 1: Introduction #
The first screen is a welcome message from Aheto. This is an introductory screen that guides you through the initial steps to ensure compatibility and explains the import process.
- Click Next to proceed.

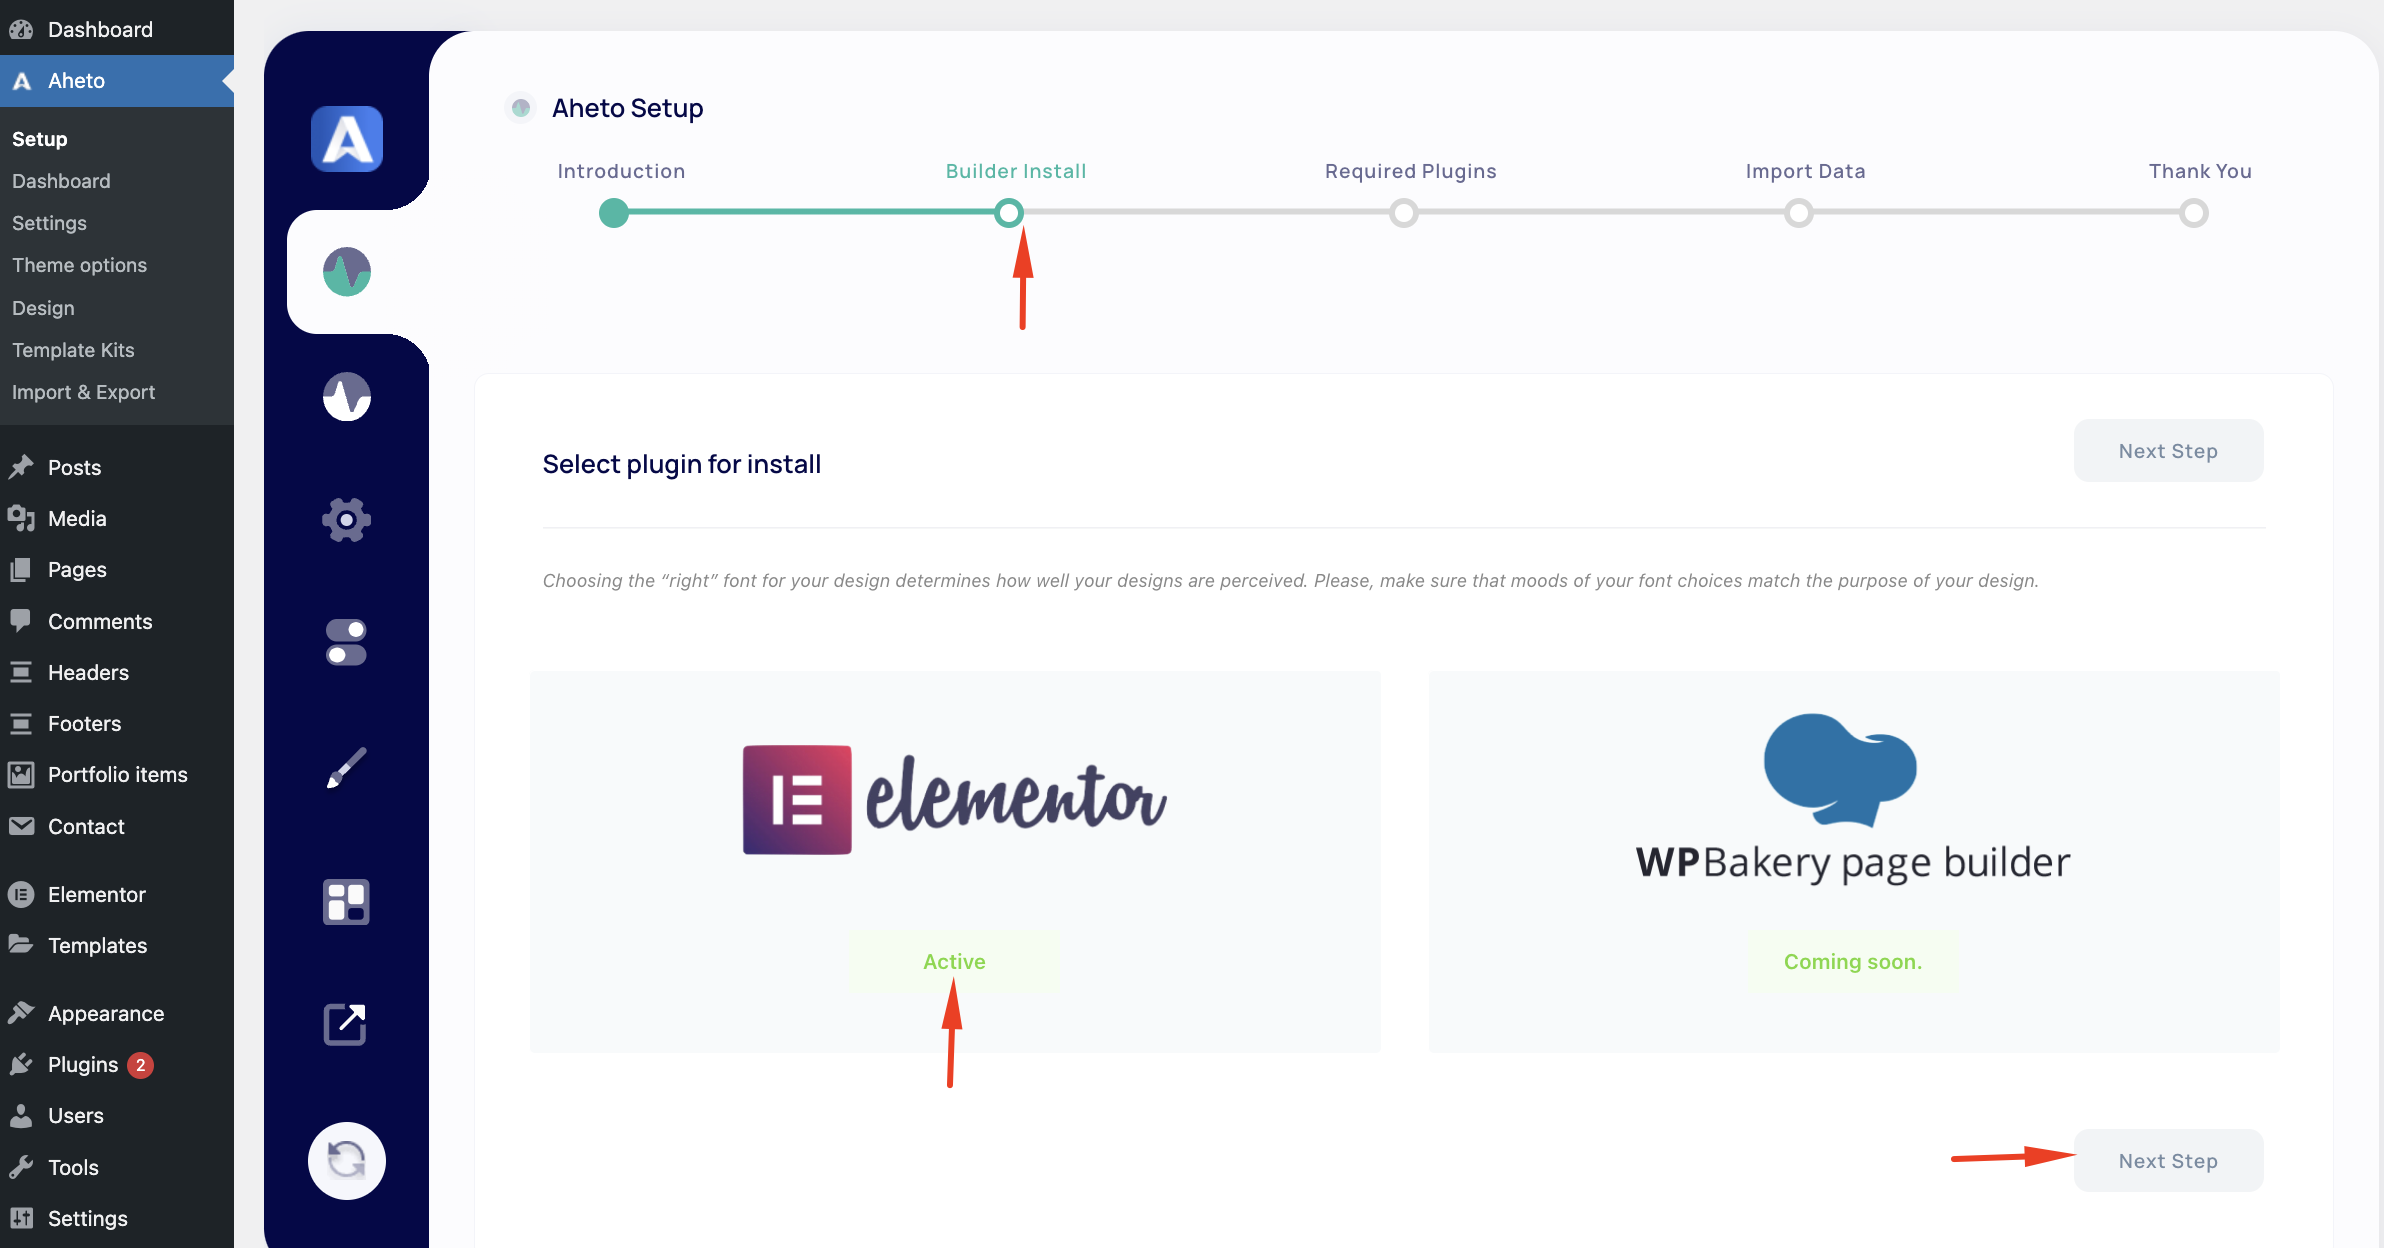
Step 2: Builder Install #
In this step, you’ll choose the page builder you want to use. Since Portomega currently only supports Elementor, select Elementor and proceed.
- Note: Portomega does not yet support WPBakery. For the best experience, ensure Elementor is installed and activated before continuing.
- Click Next to proceed.
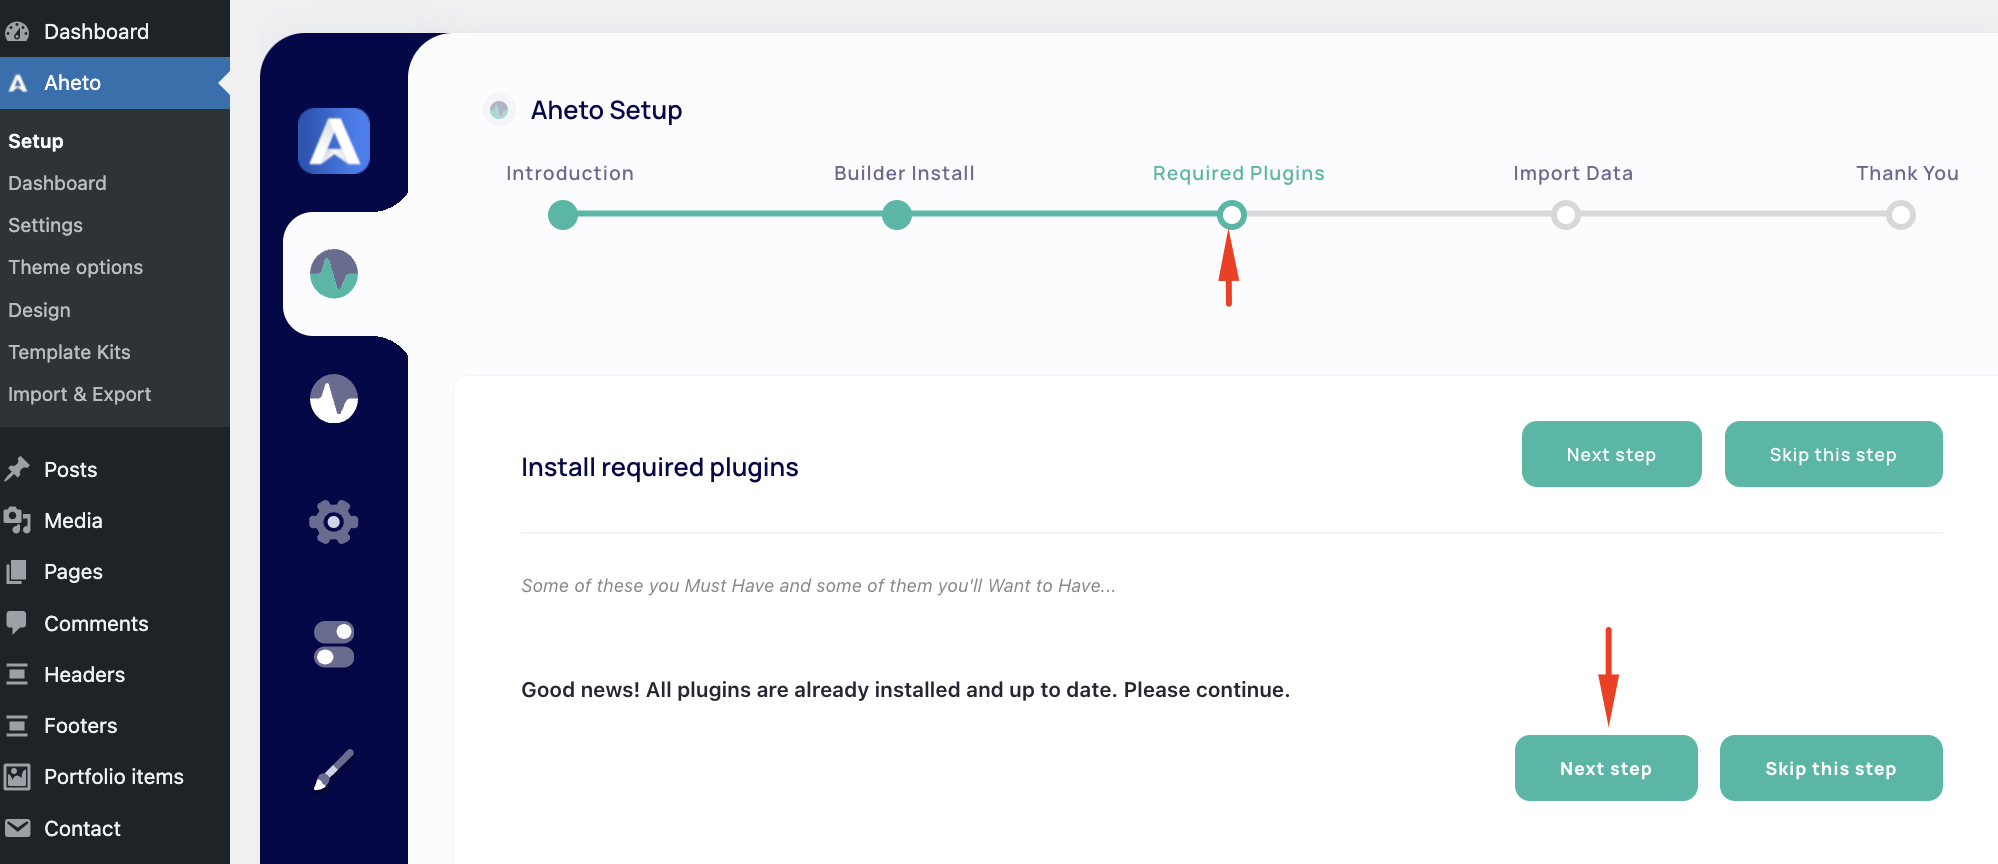
Step 3: Check for Required Plugins #
Aheto will check if all required plugins are installed and activated. If any required plugins are missing, you’ll be prompted to install them.
- If all plugins are installed, you should see a confirmation message with a prompt to continue.
- Click Next to proceed to the import step.
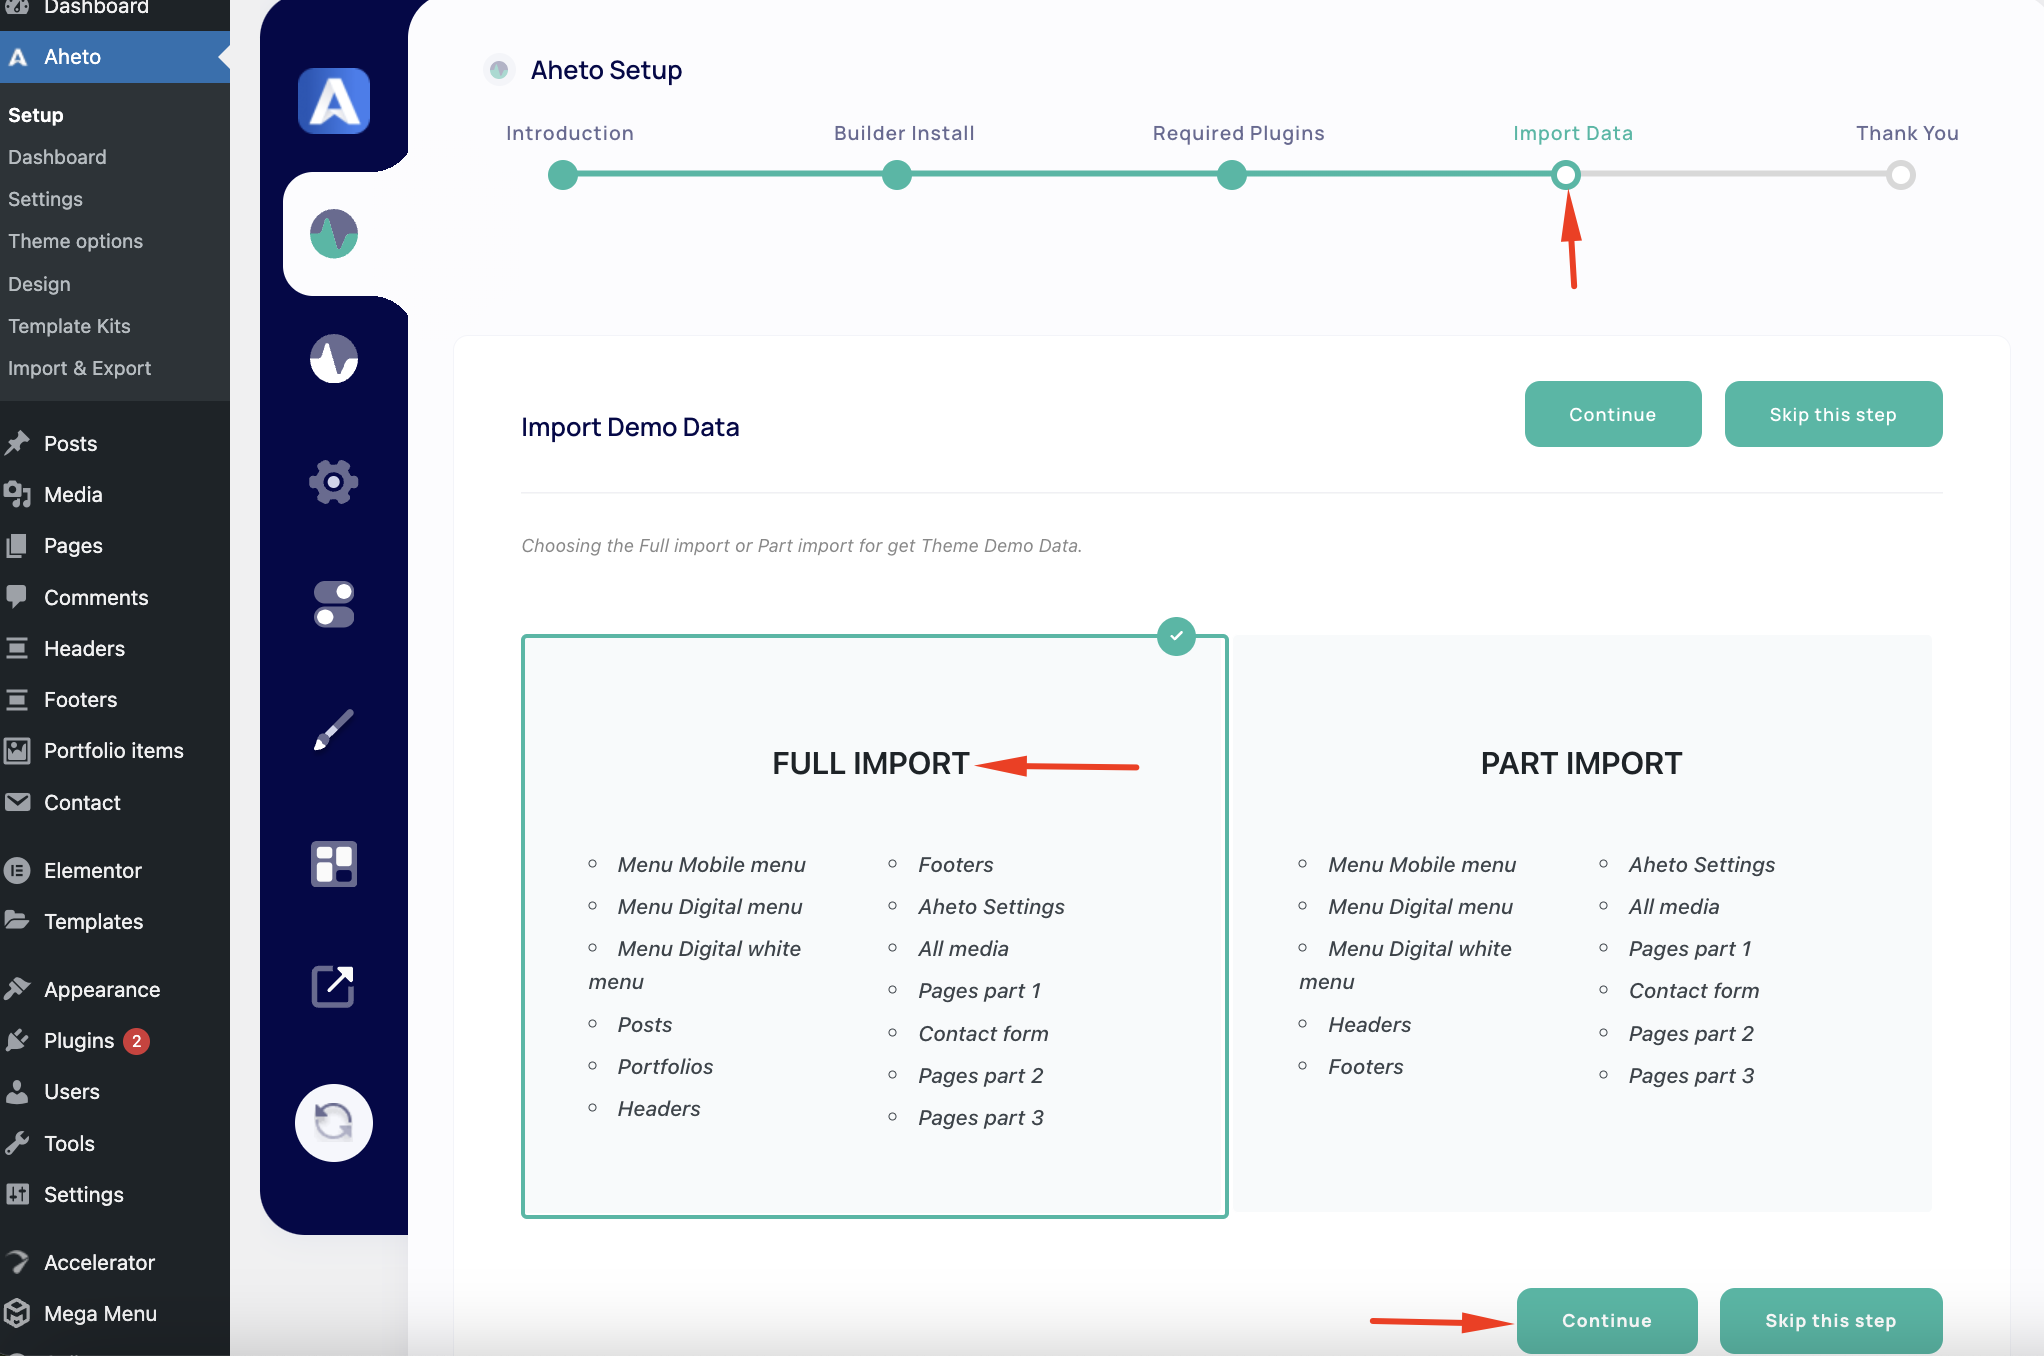
Step 4: Import Data #
This is the main step where you’ll choose the type of demo content to import.
- Full Import: Recommended for new setups, this option imports all pages, layouts, and theme structures.
- Partial Import: For existing sites, this option allows you to import specific parts of the demo (like blog pages or individual sections) without overwriting existing content.
Recommended: For new installations, select Full Import to get the complete theme setup.
- After choosing the appropriate option, click Continue to start the import. This may take a few minutes, depending on server speed and demo size.
Step 5: Thank You Section #
Once the demo content has been successfully imported, you’ll see a success message on the final screen. A prompt will appear, encouraging you to view your site’s frontend.
- Click the link to view your newly imported demo content.
Conclusion #
Following these steps, you should now have the full Portomega demo content set up on your site, allowing you to customize layouts and content as needed. If you encounter any issues during the import process, review the server settings or reach out for assistance. With the demo content imported, you’re ready to start building your site with Portomega’s full design and layout options.


