The Prague theme offers a variety of elements for displaying content on your site. The theme is compatible with both WPBakery Page Builder and Elementor, enabling flexibility in how content is presented. One of the most common ways to display content in the Prague theme is through Custom Post Types (CPTs). This guide will walk you through setting up and managing CPTs using the theme’s Custom Post Type element.
1. Understanding WordPress Post Types #
In WordPress, there are two main default post types:
- Posts: Regular blog posts or articles.
- Pages: Static pages like the About Us or Contact pages.
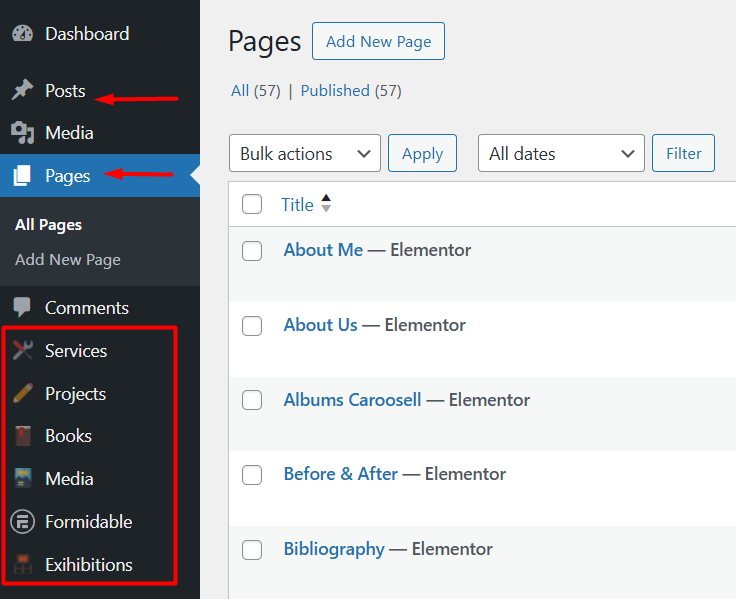
The Prague theme adds several custom post types beyond the defaults, such as:
- Projects
- Services
- Books
- Exhibitions
- Media
These custom post types allow you to categorize and organize content more effectively. For example, a Projects post type can be used to showcase various projects, while Services can be used to list the services your business offers.
2. Adding Custom Post Type Element to a Page #
To display content from a specific custom post type, you can use the Custom Post Type element in your page builder (Elementor or WPBakery). Follow these steps:
- Create a New Page: Go to Pages > Add New in your WordPress dashboard.
- Edit the Page with Elementor or WPBakery: Once your page is created, click on Edit with Elementor or Edit with WPBakery, depending on your page builder preference.
- Add Row/Column Element: Inside the page editor, first, add a Row/Column element to structure the page.
- Insert Custom Post Type Element: Within the row/column, add the Custom Post Type element.
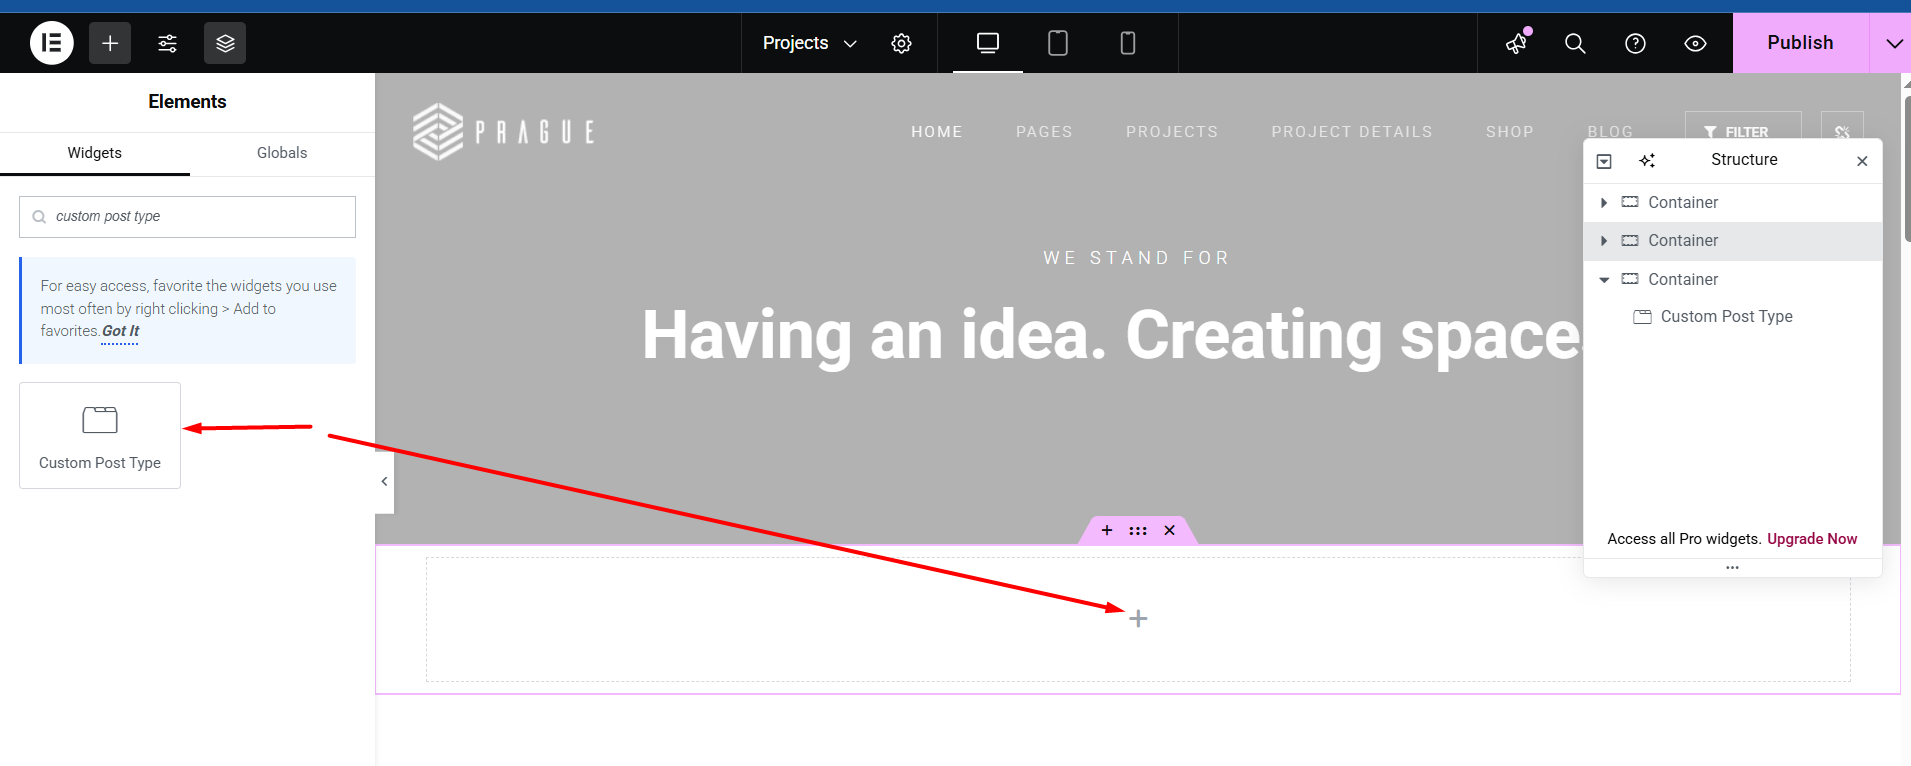
This will enable you to display content from a specific custom post type, such as Projects or Services.
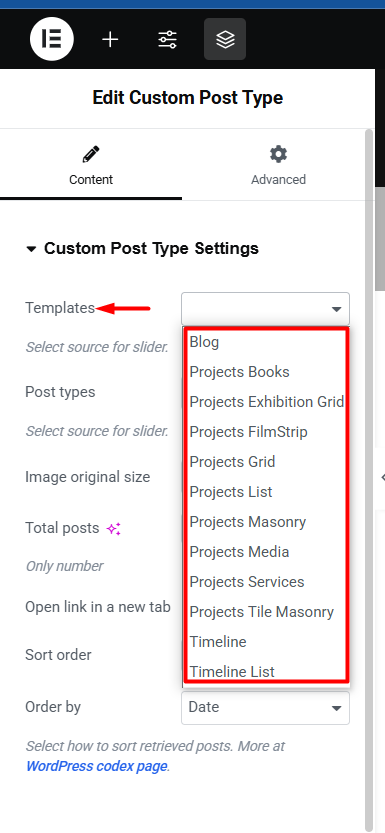
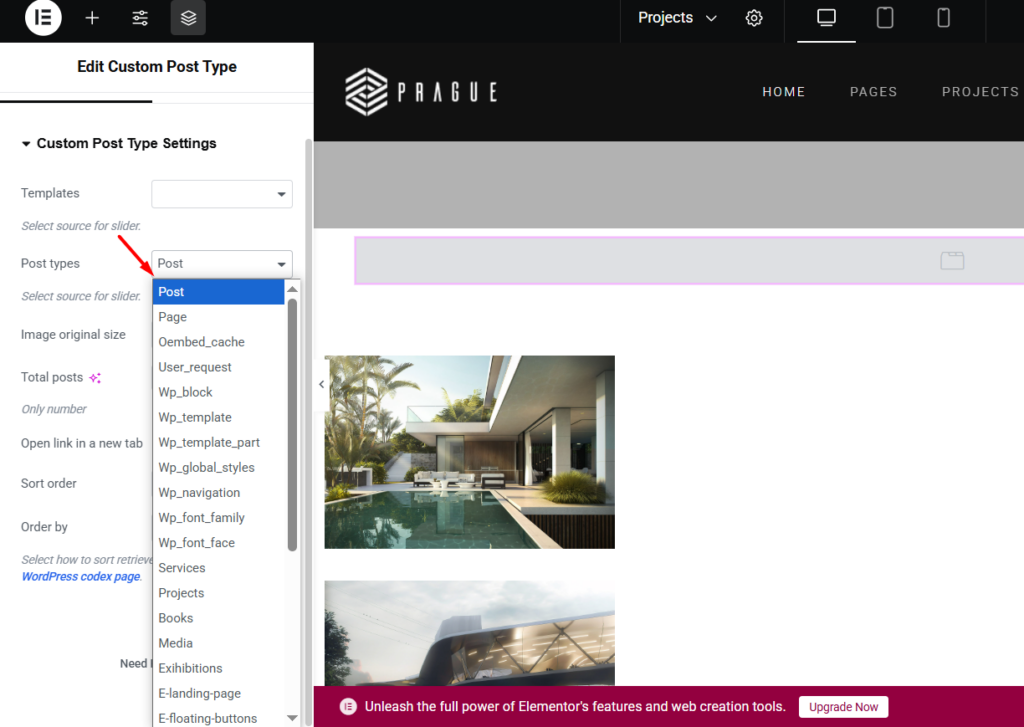
3. Configuring the Custom Post Type Element #
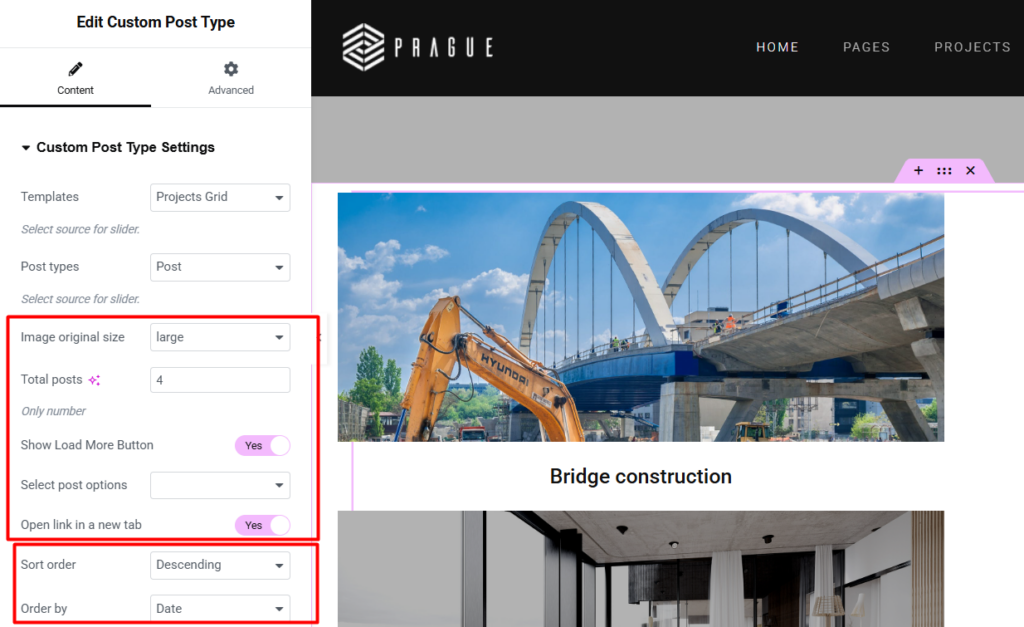
The Custom Post Type element comes with two main tabs for configuration: Content and Advanced. For displaying the posts, you’ll primarily use the Content tab.
Content Tab Options: #
- Template Style: Choose the template for displaying your posts. Templates include:
- Blog
- Projects
- Books
- Projects Exhibition Grid
- Projects Filmstrip
- Projects Grid
- Projects List
- Projects Masonry
- Projects Media
- Projects Services
- Projects Tile Masonry
- Timeline
- Timeline List
Each template has a unique design to showcase posts in different layouts (e.g., grid, list, timeline).
- Post Types: Select the post type from which content will be displayed. This can be one of the default WordPress post types (like Pages or Posts) or any of the custom post types added by Prague (e.g., Projects, Services, Books, etc.).
- Image Original Size: Choose the image size for featured images associated with the posts. Options include:
- Thumbnail
- Medium
- Medium Large
- Large
This option ensures the images are displayed correctly based on the size of the content.
- Show Load More Button: Enable or disable a Load More button, which allows users to load more posts of the selected custom post type.
- Select Post Options: This shows more options for individual posts, including metadata or additional details.
- Open Link in a New Tab: Choose whether links to posts should open in a new browser tab.
- Sorting Order: Choose between Ascending or Descending sorting of the posts.
- Order By: Define how the posts should be ordered. Options include:
- Date
- ID
- Author
- Title
- Random
- Modified
- Comment Count
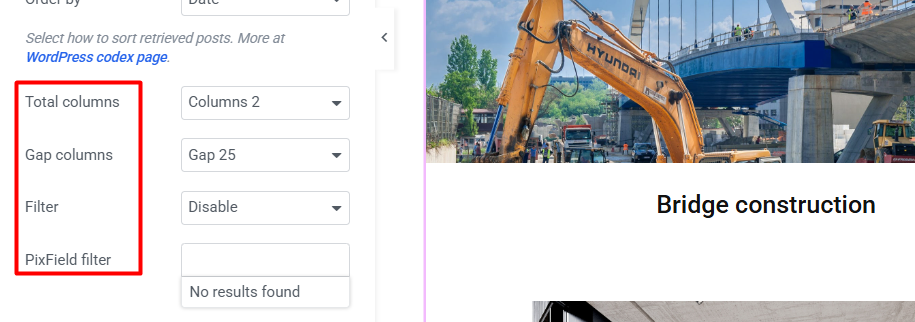
Design and Layout Options: #
- Total Columns (1-5): Choose the number of columns (from 1 to 5) to display the posts in a row.
- Gap Between Columns (10-40): Adjust the space between the columns, allowing for better control over the layout.
- Filter Enable/Disable: Enable or disable a filtering option for the posts of the custom post type.
- Filtering Type: Choose between One Criteria or All Criteria for filtering posts based on tags, categories, or other attributes.
- PixField Filter: If you have the PixField plugin installed and configured, you can enable filters based on fields in the individual posts. See more about how to setup the pixfields in your individual posts here: Setting Up and Displaying PixFields on Your Site with the Prague Theme
4. Customizing the Layout and Functionality #
Once you’ve configured the basic settings for the custom post type element, you can further customize its layout and functionality:
- Total Columns: Adjust the number of columns to control how posts are displayed in a grid.
- Gap Between Columns: Set the gap between columns to manage the spacing between items.
- Filter: Enable filters to allow users to search or sort posts by different criteria. You can also configure the filtering type for a more precise display.
5. Best Practices for Using Custom Post Types #
- Create Custom Posts Regularly: For each custom post type (e.g., Projects, Services), create relevant posts that will be displayed dynamically using the Custom Post Type element.
- Use Relevant Templates: Depending on the type of content, choose the appropriate template style for the best display format (grid, list, etc.).
- Optimize Featured Images: Ensure that each post in the custom post types has an appropriately sized featured image, as this can greatly impact the visual layout.
6. Conclusion #
The Custom Post Type element in the Prague theme provides a powerful way to display dynamic content such as projects, services, and more. By properly configuring the element, you can create beautifully designed pages that showcase your content in a variety of layouts, making your site more engaging and informative for visitors.
For more advanced configurations and if you’re using PixField filters, check out our additional documentation on setting up and using the PixField plugin.


